DIY Lighting for Product Photos
How do you create great product photos? Wait for a sunny day, drag your products outdoors, take four dozen pictures, find the best pic, and endlessly tweak it in Photoshop. No sun? How about you round up all the lamps in your house, take eight dozen pictures, struggle to find one passable photo, and then spend too much time trying to make it look ok.
Thankfully there’s a better way and you don’t have to spend a fortune on professional equipment. You’ll just need to head to the store and pick up a few items.
Here’s your shopping list:
- daylight fluorescent bulbs
- light fixtures
- white sheet (or whatever background color you’d like
- something or someway to hold your lights up (see below)
A note about the light spectrum.
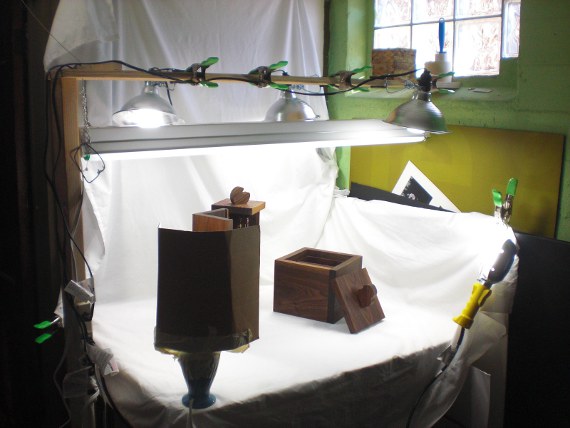
I used a number of light fixtures (you can see 4 in the picture), but you don’t need to. I thought the strip fixture would give good general lighting (it does), but the light isn’t as strong as I thought it would be. The clamp lights seem to deliver the most light and offer great flexibility (they’re about 7 dollars each). I had the trouble light (with the yellow handle) and the blue lamp with taped on cardboard already around the house, so I used them.
It is important that all lights used in the photographing area be daylight bulbs. Non-daylight bulbs will give your pictures a yellowy tint. You’ll want to arrange your lights evenly to give good light to all sides of your product. Or place your lights to one side to create a moody vibe. It’s hard to have too many lights. I went back to the store for reinforcements myself.
Fiddle with your camera.
I have a four year old point and shoot camera that cost a hundred bucks, but it has quite a few handy features. If you have a digital camera, I’m guessing your camera has a few features too. I can adjust my camera’s white balance, brightness / contrast, and lighting type exposure. Then I can save these setting for later recall.
Take some pictures.
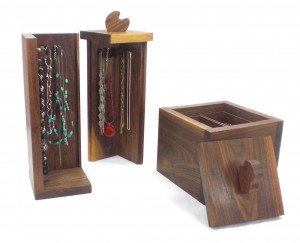
I started off lint rollering the white sheet I use for a backdrop before each shoot. But I realized fuzz and minor stains will usually disappear with enough light an proper camera fiddling so know the lint roller gathers dust. The picture below is the result of the setup shown above. 
Stayed tuned for Part II where I’ll discuss the creation of a white box for taking pictures of small pieces and free photo editing software.


