Posts

Story Books and Nursery Rhymes

 I’m working on packing some of my animals and people into story-book collections. Little Red Riding Hood, Three Little Pigs, Old MacDonald, Ugly Duckling and the like.  All the stories that are in public domain so there’s no worries about copyright infringement.  So I found some older versions of the stories (thinking the turn of the century wording would have a nostalgic twist). Good grief are they violent. 
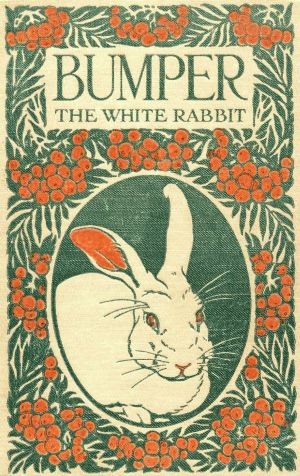
You can probably figure how the Three Little Pigs or Little Red Riding Hood works out – brutally.  Though it was sort of nice (?) to see one of the pigs win in the end.  I guess.  Still, it was all vicious stuff for my pre-schoolers just before bed. And I will not have the wolf in either story be a vile character – I’ve read my Aldo Leopold.

There’s even plenty of violence where you’d wouldn’t expect it.

Little Bo Peep:

“LITTLE Bo-Peep has lost her sheep,
And can’t tell where to find them;
Leave them alone, and they’ll come home,
And bring their tails behind them.

“Little Bo-peep fell fast asleep,
And dreamt she heard them bleating;
But when she awoke, she found it a joke,
For they were still a-fleeting.

“Then up she took her little crook,
Determin’d for to find them;
She found them indeed, but it made her heart bleed,
For they’d left all their tails behind ’em.”

Why do their tails have to be cut off?  I always thought, “leave them alone and they will come home, bringing their tails behind them,” a sweet line – I never imagined the tails were physically cut off.

Some stories are violent and mean.  Clearly the Ugly Duckling was tamed down in my kindergarten class.  The bullying I remember was bad enough (terrible in the original), but also in the original is a passage the ugly duckling finally makes some friends and then they’re instantly shot by a hunter.  Why?

Even baa baa black sheep.  Have you any wool little sheep?

Quote the black sheep:

“”Yes, marry, have I,
Three bags full:
One for my master,
And one for my dame,
And none for the little boy
Who lives down the lane.”

Phh . . .   Why none?  You have three bags you stingy sheep?  I say bag the original text (pun intended).  I’ve rewritten it:

“Yes, marry, have I,
Three bags full:
One for my master,
And one for my dame,
And the best one for the little boy
Who lives down the lane.”

So I’m in the process of rewritting a lot of these old tales.  I’ll keep some of the text, but most is headed for my computer’s recycling bin.  The world is violent and mean enough – children will be exposed to it all and yes, I’d like to keep them from it as best I can.
DIY Lighting for Product Photos

How do you create great product photos?  Wait for a sunny day, drag your products outdoors, take four dozen pictures, find the best pic, and endlessly tweak it in Photoshop.  No sun?  How about you round up all the lamps in your house, take eight dozen pictures, struggle to find one passable photo, and then spend too much time trying to make it look ok.

Thankfully there’s a better way and you don’t have to spend a fortune on professional equipment.  You’ll just need to head to the store and pick up a few items.

Here’s your shopping list:

  • daylight fluorescent bulbs
  • light fixtures
  • white sheet (or whatever background color you’d like
  • something or someway to hold your lights up (see below)

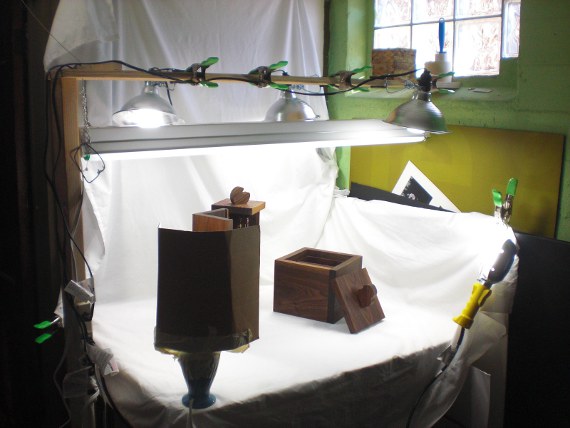
Happy Bungalow DIY lighting setup

A note about the light spectrum.

I used a number of light fixtures (you can see 4 in the picture), but you don’t need to.  I thought the strip fixture would give good general lighting (it does), but the light isn’t as strong as I thought it would be.  The clamp lights seem to deliver the most light and offer great flexibility (they’re about 7 dollars each).  I had the trouble light (with the yellow handle) and the blue lamp with taped on cardboard already around the house, so I used them.

It is important that all lights used in the photographing area be daylight bulbs.  Non-daylight bulbs will give your pictures a yellowy tint.  You’ll want to arrange your lights evenly to give good light to all sides of your product.  Or place your lights to one side to create a moody vibe.  It’s hard to have too many lights.  I went back to the store for reinforcements myself.

Fiddle with your camera.

I have a four year old point and shoot camera that cost a hundred bucks, but it has quite a few handy features.  If you have a digital camera, I’m guessing your camera has a few features too.  I can adjust my camera’s white balance, brightness / contrast, and lighting type exposure.  Then I can save these setting for later recall.

Take some pictures.

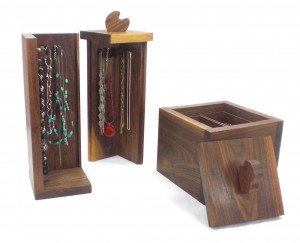
I started off lint rollering the white sheet I use for a backdrop before each shoot.  But I realized fuzz and minor stains will usually disappear with enough light an proper camera fiddling so know the lint roller gathers dust.  The picture below is the result of the setup shown above.  Happy Bungalow DIY lighting setup results - walnut boxes


Stayed tuned for Part II where I’ll discuss the creation of a white box for taking pictures of small pieces and free photo editing software.