Posts

Castle tower toy prototype

Throw Back Thursday – Castle Edition

wooden castle prototype

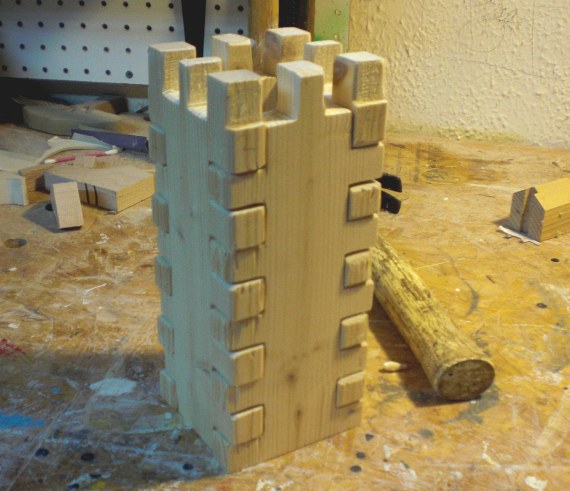
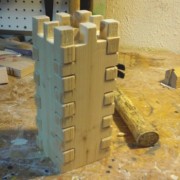
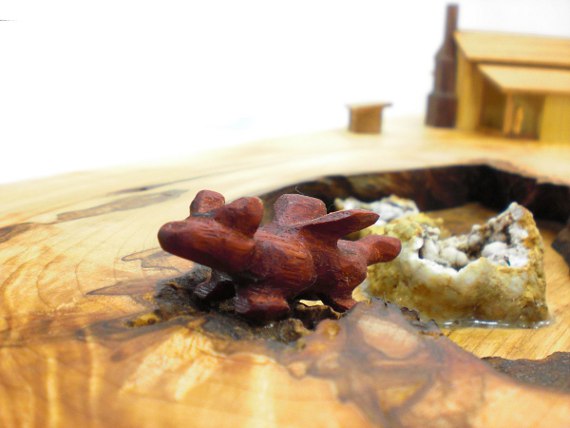
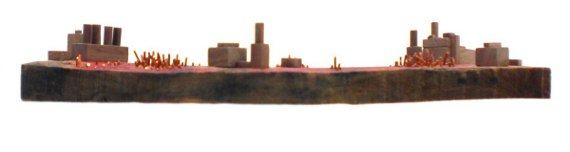
In recognition of Throwback Thursday we post this old prototype.  It’s one of about a dozen attempts at creating castle themed bookends.  I never figured out how to make them to the level of quality we strive for, and for the price we thought they could sell at.  The idea was for the bookends to be playable toys, outfitted with simple dowel people (much like the little peg people you see everywhere).

Perhaps we need to go back a little further.

Before Happy Bungalow was Happy Bungalow it was Kiddie Kottages.  When Liz and I were first dreaming up this business we were going to create playhouses for children (spurred on by the encouragement of friends, see the playhouse here).  We made notes and sketches.  We created 3D models of the playhouses.  We thought up just the right business name and registered domains (until recently kiddiekottages.com and kiddiecottages.com redirected to happybungalow.com).

And then we thought up some little products to accompany the playhouses.  The idea was that we’d make the playhouses and everything you needed to put in them.  So the original Happy Bungalow product line started out as accessories to Kiddie Kottages’ big playhouses.  But starting a new business and creating these multi-thousand dollar playhouses was too much, so we focused on the smaller pieces at first with the goal to move on to playhouses later.

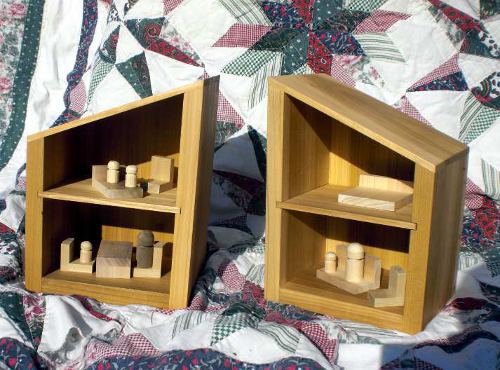
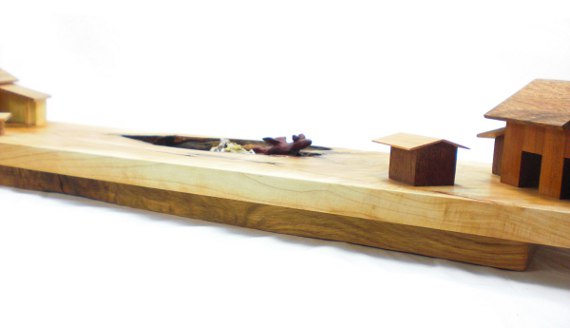
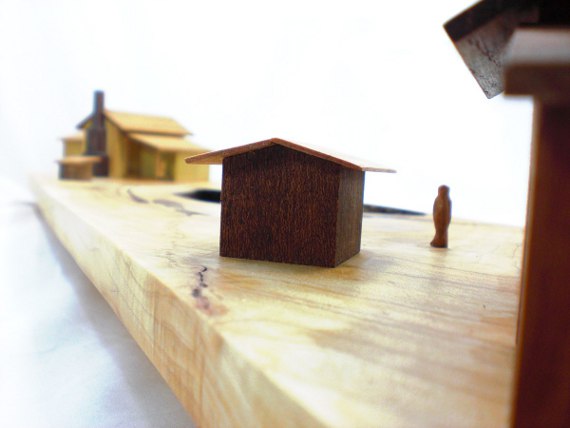
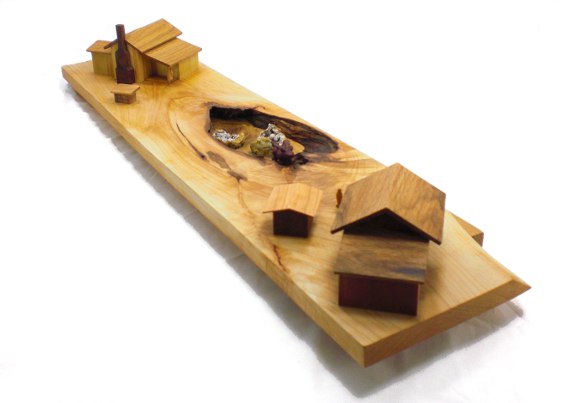
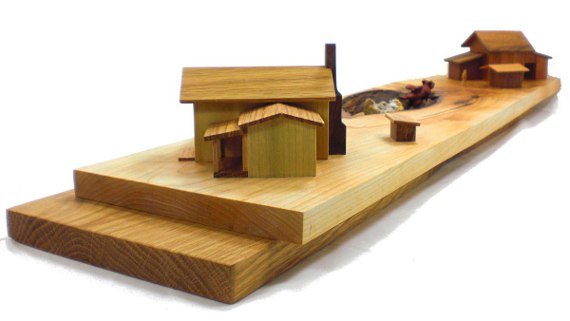
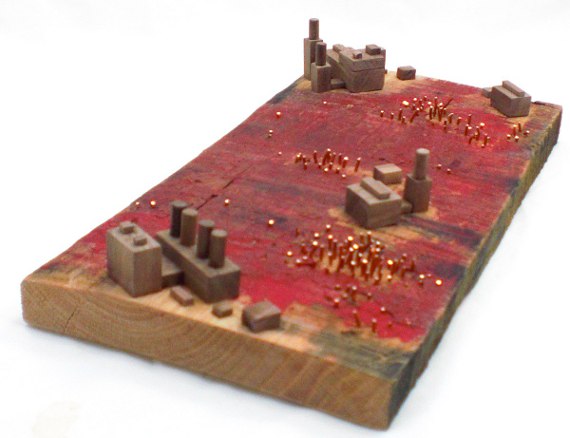
We’ve pretty much given up on the playhouses for the immediate future, but some of those original products still hang on (our wooden animal toys being the most notable).  Much like the never realized castle bookends, the dollhouse bookends below went through extensive prototyping (and before that digital models you can read about here), but end the end it was hard to find a workable price-point for them.  It was also difficult to generate the level of quality (again at workable price point).  Though the shop has expanded its tooling, we might take another attempt at it.

dollhouse family

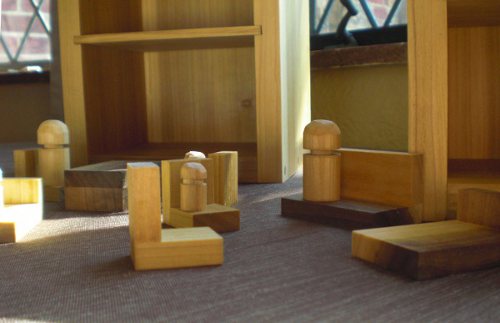
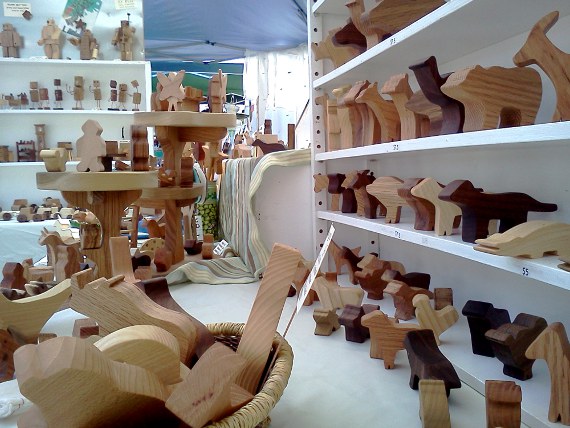
The simple little furniture did prompt a friend to ask if I could make some furniture for her daughter’s inherited dollhouse.  Well, that is a product line that has done quite well (read more dollhouse furniture posts here).

dollhouse bookends

So in the end the castle bookends never made it into production.  The corner joints (box joints) were the problem.  I was attempting to create a faux quoining (fancy architecture word for those stones that stick out on the corner of buildings).  Perhaps one of these days . . .

Homestead – Wooden Art

This is a companion piece to another wooden art piece I did:  “Pa Never Thought Much of the Sinkhole Until the Dragon Came Out of It”

This piece, Homestead, is loosely related, or not at all related.  Copper and wood are the materials used, and are some of our favorite materials to make wooden toys from as well.wood art - log cabin - racoons eye viewwood art - log cabin with copper trees  Wood art - log cabin and outbuilding wood art - log cabin homestead

Craft Show Post Show

Happy-Bungalow-art-craft-show-setup-2013-09-08-alt002-570

I’ve embraced the idea of being a toy-maker.  Initially I was hesitant for a two reasons.

One:  I thought I was excluding too much potential customers.  Ha!  It turns out there’s loads of adults out there who still want to have fun.  Also, developing a new product line is time consuming; perfecting the craft even more so.  It’s better to focus on what I know best and build upon it.

Two:  I wasn’t comfortable with being labeled a toy-maker, but I’m cool with it now.  It makes people happy.  What I do makes other people happy!  And I make a few bucks doing it.  It’s hard to beat that.  Though I still make business card holders, the occasional clock, and the coolest cabinet hardware you’ve seen.  And that gray area of toys:  miniature furniture.

So I’ve been growing the toy lines.  Adding more robots, many more animals, and unicorns.  I’ve also added completely new lines of cars/trucks, pirates/sea life, and aliens/monsters.  There’s plans on the horizon to create a line of boats and airplanes.  Just about something for everyone, and all within the toy umbrella.

So with all this new stuff I’ve been tweaking the show setup lately.  It’s no longer a matter of filling space, but trying to keep the space organized so people can find everything.

Happy-Bungalow-art-craft-show-setup-2013-09-08-alt001-570

This is my setup from the past week.  I’ve added another shelf to hold animals and I could use more space with all the animal requests coming in (just when I thought I had them all).  A revamped circus is back on display along with the play trees.  Gone is the very tall tree stand, though I’d love to get it back into the mix somehow, perhaps on a back table.

The robots, cars, and monsters are getting along well with each other.  I have a magnetic board that’s super-handy for switching around displays.  I’m planning on adding another shelf there for the old railroad town buildings and expanded dollhouse furniture display.

Beyond product I also want to add more fun to the booth. For the website, I’m working on a story that links all the different toy worlds together that I want to bring to the physical. You can see a piece of it in the air. To the left of the sign post is a kids floating away holding onto a bunch of balloons.  He couldn’t afford a hot-air balloon ride at the circus, but he could buy helium balloons on the cheap (in the story this sends him to fairy land).  So I’ll be working with the Kids to build more props.  Stay tuned everyone.

Pa and the Dragon

The full title:

“Pa Never Thought Much of the Sinkhole Until the Dragon Came out of It”

wood + geode + dragon

(scroll to the send for more yapping)

Happy-Bungalow-Pa-Sinkhole-Dragon-wood-sculpture-art-storytelling-art-artisan-alt008-570 Happy-Bungalow-Pa-Sinkhole-Dragon-wood-sculpture-art-storytelling-art-artisan-alt001-570 Happy-Bungalow-Pa-Sinkhole-Dragon-wood-sculpture-art-storytelling-art-artisan-alt006-570 Happy-Bungalow-Pa-Sinkhole-Dragon-wood-sculpture-art-storytelling-art-artisan-alt009-570 Happy-Bungalow-Pa-Sinkhole-Dragon-wood-sculpture-art-storytelling-art-artisan-alt007-570 Happy-Bungalow-Pa-Sinkhole-Dragon-wood-sculpture-art-storytelling-art-artisan-alt005-570 Happy-Bungalow-Pa-Sinkhole-Dragon-wood-sculpture-art-storytelling-art-artisan-alt004-570 Happy-Bungalow-Pa-Sinkhole-Dragon-wood-sculpture-art-storytelling-art-artisan-alt010-570

More about this piece:

Pa stands outside the barn eying the infant dragon crawling from her egg.  Another figure watches the scene from the porch.

I sell at a weekly farmer’s market along with some guys selling rocks, minerals, and gems.  I picked up some pieces of quartz and some geodes.  What to do with them?  I started off with the quartz and channeling Renaissance Festivals past I thought of wizards and dragons.  So I start doodling castles and imaginary lands, but I wasn’t feeling it.

I liked the dragon idea though.  Then poof –  a farm hits me.  A dragon crawling out of a sinkhole!  I put down the pencil and start digging around the shop.  The top board is a piece of maple I had been saving for a furniture piece (a table), but I thought it made a great sinkhole.  A piece of oak made the perfect subterranean earth.

Originally the geode was to be the mouth of a cave, but the scale of the buildings and the process said the geode served better as an egg.  Pa thought the egg just another hunk of rock and earth.  The sinkhole a convenient dump.  Now though.  Now he doesn’t know what to make of it.

The geode is from an Indiana creek.  The top board is maple with natural knot hole.  The lower board is oak.  The other woods are a mix of poplar, walnut, hickory, cedar, oak (again), maple (again), walnut, and cherry.  While not built to scale, the buildings are roughly an eighth of an inch to a foot.

Abasement

wood + wax + copper

I’ve had this piece of wood laying around the shop for years now.  A slice of red oak covered in red wax.  When a tree is cut down and ripped into rough lumber the ends of the boards are coated in wax (or something similar) to prevent the wood from drying quickly.  This piece of lumber was overly slathered in wax – it’s different – it looks cool.  I kept it to the side.

So what you see is naturally unnatural.  I applied the little walnut structures and inserted the copper wire.  During the production of this piece I slightly damaged an existing flaw in the wood.  Care will need to be exercised to avoid further degradation.

Happy-Bungalow-Abasement-wood-sculpture-storytelling-wood-copper-wax-alt006-570 Happy-Bungalow-Abasement-wood-sculpture-storytelling-wood-copper-wax-alt002-570 Happy-Bungalow-Abasement-wood-sculpture-storytelling-wood-copper-wax-alt008-570 Happy-Bungalow-Abasement-wood-sculpture-storytelling-wood-copper-wax-alt007-570 Happy-Bungalow-Abasement-wood-sculpture-storytelling-wood-copper-wax-alt003-570 Happy-Bungalow-Abasement-wood-sculpture-storytelling-wood-copper-wax-alt004-570

Robots!

Happy-Bungalow-Wood-Robots-alt001-570t

New Cabinet Hardware

 I just finished up a custom set of cabinet hardware for a client.  All wood – the knobs are cherry with square walnut inlays and the pulls have walnut posts with cherry handles.Happy-Bungalow-custom-wood-cabinet-hardware-knob-pull-cherry-walnut-alt001-570t

D.O.G.

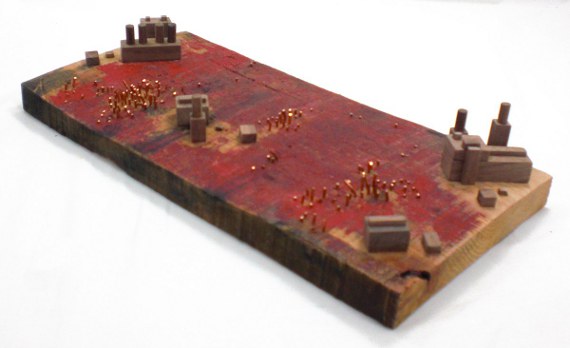
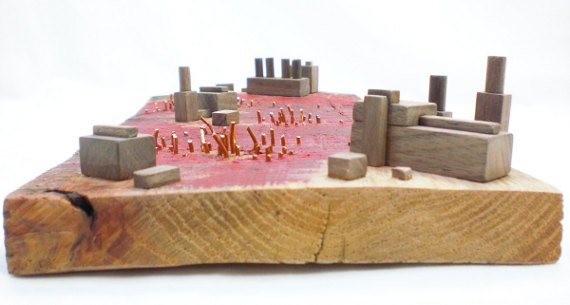
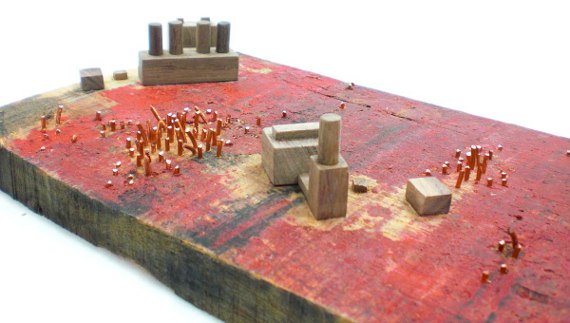
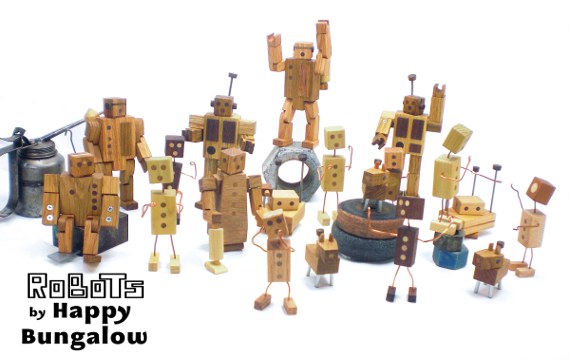
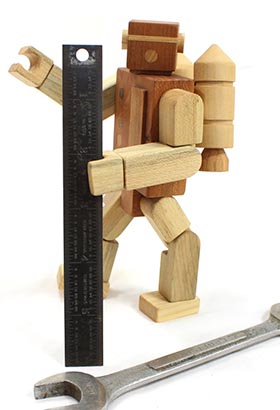
The newest robot of the line – oh they’re so cute.

Robots on the Brain

I’ve had loads of rave reviews about the new Happy Bungalow robot line (fingers crossed for more).  As such I’ve been working on expanding the line.  First up are prototypes SC”OUT and DOG  I’m working on the back-stories for each.

My wife commented that the DOG robot looks a bit like a sheep.  HA!  How about Sherpard’s Helper Electronic E-something Protection?  I don’t have the name fully worked out, or a working prototype, but I have the backstory – it’s great, but you’ll have to wait.

SCOUT isn’t an anagram – just a name.  It’s another XyThanP Corp robot (like the XR14-J).  I believe it’s another XR model – single digits probably, but I’ll have to confirm that.  XyThanP Corp’s PR department has been tight-mouthed of late.  I think it has something to do with the mining equipment scandal, but that’s just my opinion.  I hope to secure more information soon.

DIY Lighting for Product Photos

How do you create great product photos?  Wait for a sunny day, drag your products outdoors, take four dozen pictures, find the best pic, and endlessly tweak it in Photoshop.  No sun?  How about you round up all the lamps in your house, take eight dozen pictures, struggle to find one passable photo, and then spend too much time trying to make it look ok.

Thankfully there’s a better way and you don’t have to spend a fortune on professional equipment.  You’ll just need to head to the store and pick up a few items.

Here’s your shopping list:

  • daylight fluorescent bulbs
  • light fixtures
  • white sheet (or whatever background color you’d like
  • something or someway to hold your lights up (see below)

Happy Bungalow DIY lighting setup

A note about the light spectrum.

I used a number of light fixtures (you can see 4 in the picture), but you don’t need to.  I thought the strip fixture would give good general lighting (it does), but the light isn’t as strong as I thought it would be.  The clamp lights seem to deliver the most light and offer great flexibility (they’re about 7 dollars each).  I had the trouble light (with the yellow handle) and the blue lamp with taped on cardboard already around the house, so I used them.

It is important that all lights used in the photographing area be daylight bulbs.  Non-daylight bulbs will give your pictures a yellowy tint.  You’ll want to arrange your lights evenly to give good light to all sides of your product.  Or place your lights to one side to create a moody vibe.  It’s hard to have too many lights.  I went back to the store for reinforcements myself.

Fiddle with your camera.

I have a four year old point and shoot camera that cost a hundred bucks, but it has quite a few handy features.  If you have a digital camera, I’m guessing your camera has a few features too.  I can adjust my camera’s white balance, brightness / contrast, and lighting type exposure.  Then I can save these setting for later recall.

Take some pictures.

I started off lint rollering the white sheet I use for a backdrop before each shoot.  But I realized fuzz and minor stains will usually disappear with enough light an proper camera fiddling so know the lint roller gathers dust.  The picture below is the result of the setup shown above.  Happy Bungalow DIY lighting setup results - walnut boxes


Stayed tuned for Part II where I’ll discuss the creation of a white box for taking pictures of small pieces and free photo editing software.