Posts

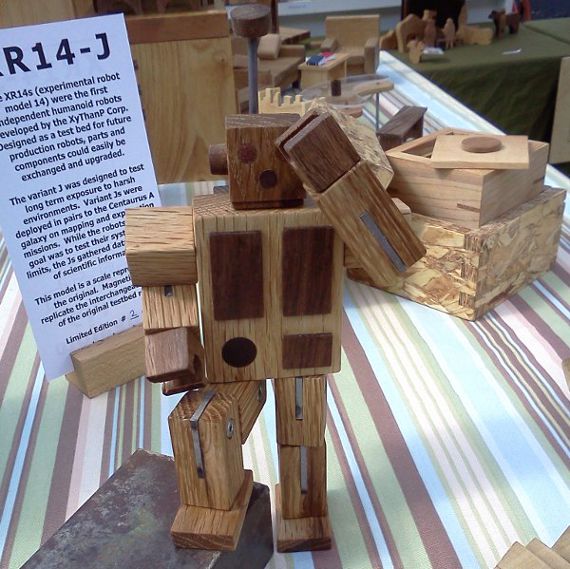
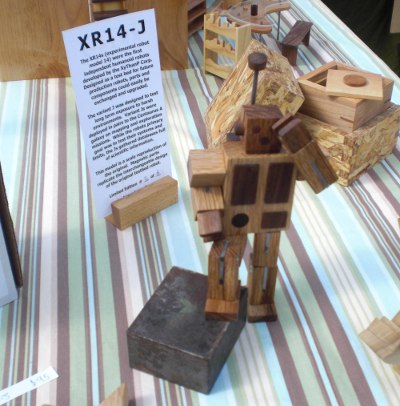
tired wood robot toy after long day of work

One Year Anniversary

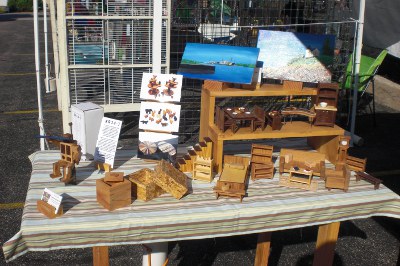
Happy Bungalow is one year old!  We celebrated at our hometown show.  We’ve come a long way since last year (view here)

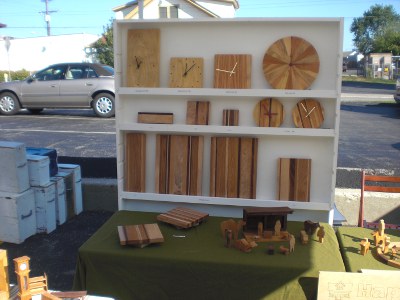
There’s a number of new products and new show furniture to display them on.

A new easier on the back sign

And ever popular dollhouse furniture.

I’ll be adding more products for the upcoming slate of fall shows and I’m going to tweak the booth o give things a bit more pop.

The anniversary show went off well – increased sales from a year ago, loads of business cards handed out, and bunches of conversations.  A tiring day, but fun.  Phew.

First Show of the Year

The clouds are clearing, the ice is melting, and the flowers are poking out of the soil.  That means it’s time to leave the shop and take the Bungalow to the masses. Last year was our first year in business and the first year doing arts / crafts shows.  See pictures from the first show here.  We’ve learned a lot and we’re working to put together two show packages – small for local one day shows and big for multi-day shows (an effort to spread out the back breaking).

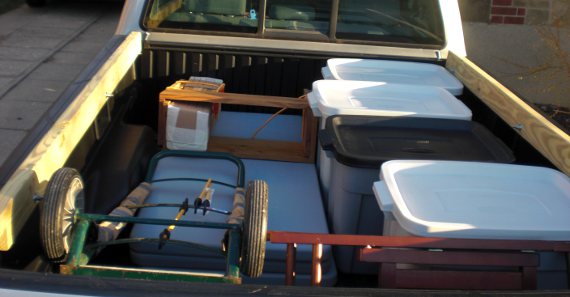
The first show of the year was a one-day local show so it was a good time to test out some the small show package.  First up is loading everything into the truck.  Boy, has this step greatly improved!  It’s quick and organized.  Also new this year is a checklist – no more forgetting signs.Packed truck with show materials

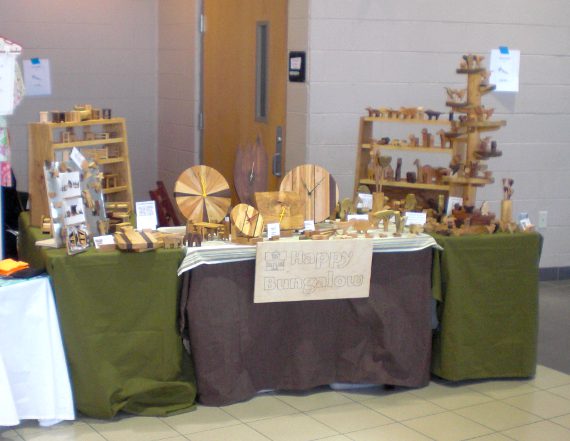
For the first show last year I built wood tables, but they’re heavy and take a some time to set up.  This year I’m trying out plastic tables with table cloths.  Much quicker to set up, but I need fitted table covers.  The standard “sheet” type don’t look 100% professional.

Happy Bungalow show display tablesYou can see the new small show sign as well.  The other sign is too big to find a spot on the small tables.  I only had an 8 foot x 6 foot space to work with – so there’s just enough room for me, none for a big sign.

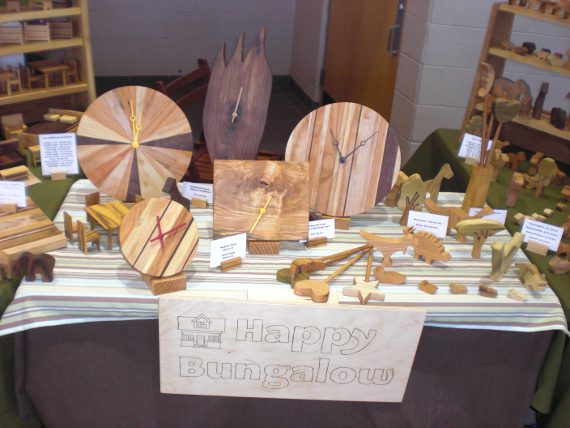
For the next show I’m going to work on putting more height into the tables.  I want to step the products to give them more space and visibility.

Happy Bungalow display table

New Hardwood Clocks Are For Sale

You’ve read all the whole behind the scenes series about the hardwood clocks, now find them for sale in Happy Bungalow’s etsy shop.

Wood Clocks Process #4 – Finished Product

Missed the creation of the clocks?  Read part one, part two, and part three.

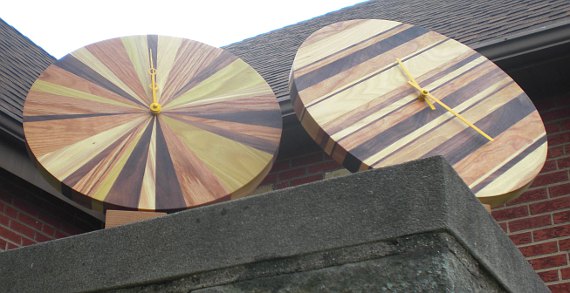
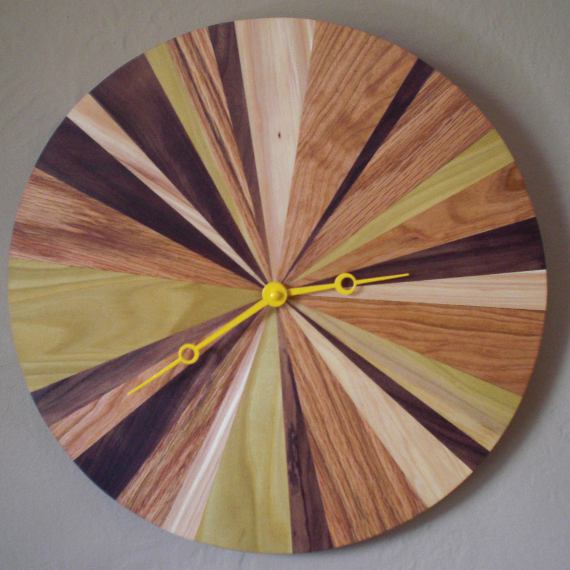
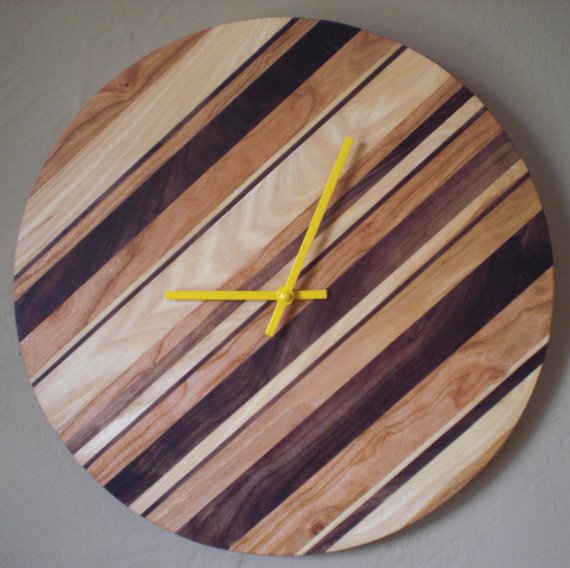
Hooray!  The hardwood clocks are finished (get it?  finished?), their dials have been painted, the movements installed, and the hangers hung.  Shown below is a strip clock (I’m open to catchier names) and the oh-so-cleverly named five grain clock (five different types of wood).  None of the wood was stained – the colors you see are natural.

Happy Bungalow Hardwood Clocks - Five Grain and Strip

A closer look at the five grain clock.  The darkest wood is walnut and the lightest is hickory.  The greenish wood is poplar.  The reddish wood with the wavier grain is cherry, and the reddish wood with the tighter grain is red oak.  The dials are metal and hand painted with yellow enamel paint.

Happy Bungalow Five Grain Clock

The strip clock only has three woods.  The dark is walnut and the lightest is hickory.  Cherry is the friendly red.  Once again, the dials were hand painted yellow.

Happy Bungalow Strip Clock

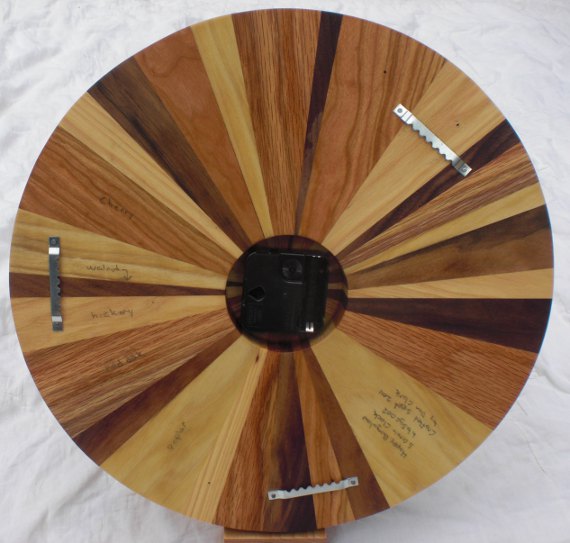
Below is the rear of the five grain clock.  Each clock has three separate hangers so you can mix up the position of the clock.  Of course after I attached the hangers I discovered you can’t willy-nilly put on the hangers – Twelve O’clock doesn’t coordinate with any position.  After some dial spinning and head scratching I figured it out and repositioned two of the hangers.  Oops (these clocks will have a discount in the etsy shop).

All of the woods are labeled on the back – no need to be a wood expert to impress your friends.  “Yes, this is cherry, and that is hickory.”  The clock crafted date and signature is listed as well.

Happy Bungalow Five Grain Clock

http://happybungalow.com/blog/2011/09/22/wood-clocks-process-3/

Wood Clocks Process #3

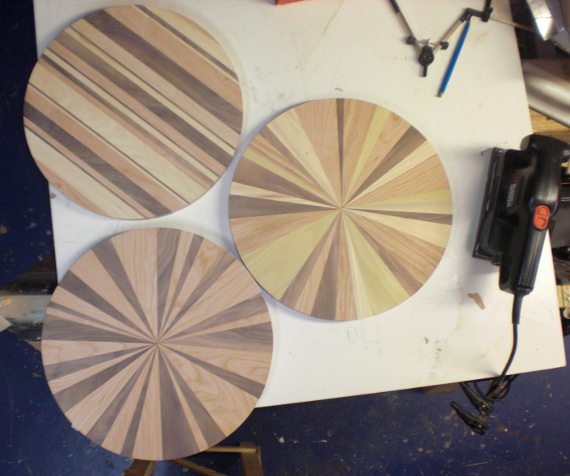
In the previous post our wood clocks were dry-fitted and glued-up (read the post here).  You may remember some dried up glue that leaked out of the joints.  The glue was knocked away with a sander as were any wood segments that were higher than the others.  Despite the best efforts of the heavy took box, some of the pieces moved up oh so slightly.  Ideally I’d run the clocks through a planer (mine isn’t wide enough) or a wide belt sander (nobody has dropped one off at the shop).  So I sand them down with a 1/3 sheet sander.

Happy Bungalow Wood Clock Process 10 Wood Clocks Post Sanding

The next step is to trim up the clocks.  I lay out the circle with my drafting compass (in the upper right in the picture below) and lay out a circle as big as the smallest wood segment.  In short – I make the clock as big as I can.  I trim the circles on the bandsaw, sand the edges smooth on a stationary belt sander, and bring them back to the table.

You can see how much sanding dulls the look of the wood.  I plane all my wood in the shop (three giant knives spinning really fast and slicing away wood) – which leaves the wood ultra smooth.  Sanding also smooths the wood, but instead of slicing the wood, the sanding compresses the grain of the wood, so it doesn’t look as crisp.  But don’t worry, we’re going to fix that during the finishing.

Happy Bungalow Wood Clock Process 11 Wood Clocks Cut To Circles

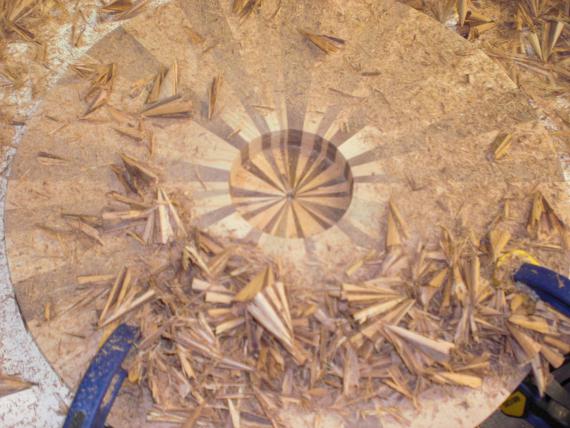
There’s one last step before the finishing – cutting holes for the clock movement (the gizmo that turns the clock hands).  I start with drilling a small hole through the center on the front.  Then I drill a big hole in the back (I’m thinking the Bungalow’s resident hamster may find some use for them).

This part’s a little tricky – drill too far and the clock is ruined.  Drill not far enough, and well – just drill some more.  Fortunately my 3-1/8 inch drill bit isn’t very fast.  Notice the clamps in the picture.  The clock must be clamped to something secure as the large drill bit creates a lot of torque.

HappyB ungalow Wood Clock Process 12 Wood Clock Drilled For Clock Movement

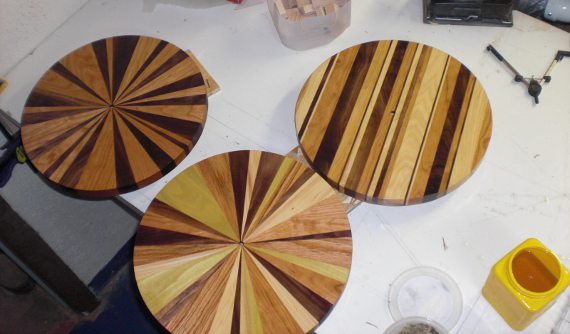
Now the fun part – finishing.  I finish the clocks with pure tung oil – which penetrates the wood to protect it.  Pure tung oil is a legitimate natural finish.  The only thing in my tung oil?  Tung oil.  There’s no laundry list of additives and chemicals on the side of the jar.  The only thing I add is citrus solvent which thins the oil to aid penetration into the wood.

Citrus solvent?  It’s natural too – derived from oranges.  And it smells great – the whole shop smells like oranges.  The tung oil gives the wood a lot of pop and shows off the grain well.

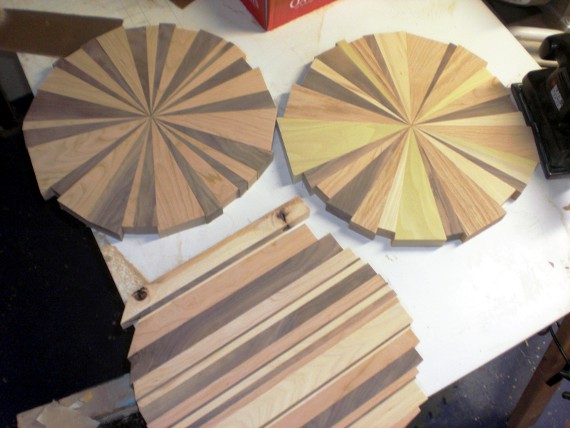
Grain?  The upper left clock has alternating segments of walnut and cherry.  The lower clock has cherry, walnut, poplar, red oak, and hickory.  The strip clock has hickory, walnut, and cherry.

Happy Bungalow Wood Clock Process 13 Finished With Tung Oil

Read the fourth and final post here

Wood Clocks Process #2

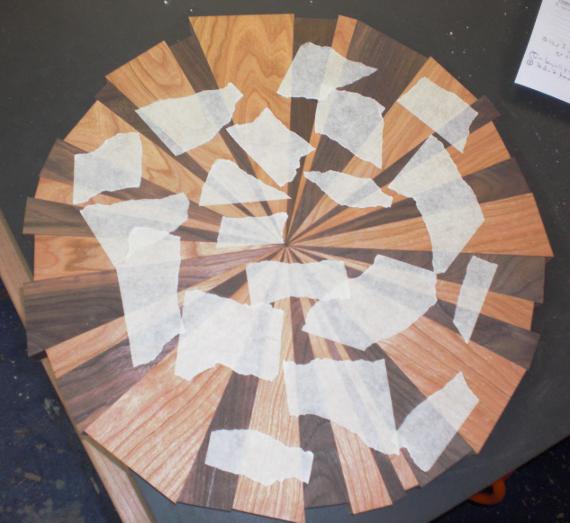
In  part one of the wood clocks process series (read here) I talked about cutting a number of angled pieces of wood.  A box-full of wood pieces, in fact.  I lay all the pieces out on a table and go to work creating a pleasing composition.  With some fussing, this process goes easy until the clock circle is about seven-eigths full.  Then it’s time to trade out triangles here and there to make a 360 degree circle.  To make certain of this, I tape the pieces securely together.  Once I have a working circle I move some of the triangles around to fuss with the layout.

Happy Bungalow Wood Clock Process 06 Walnut Cherry Dryfit Layout

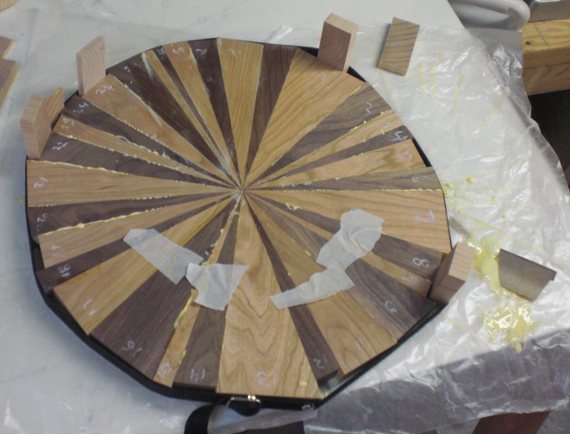
Next comes the glue.  I lay down some wax paper on the table to keep the clock from gluing itself to the table.  There’s between 25-35 pieces in each clock and each side needs glue applied evenly.  I have to move quickly so the glue doesn’t set before I’m finished.  You can see the glue squeezing out in the picture below – this is a good thing as it means the joints are filled.

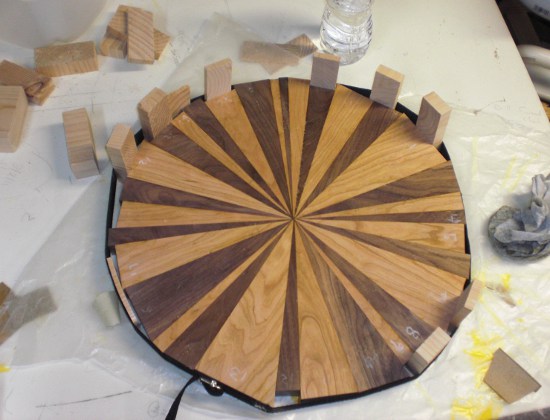
Once all the glue is on and the pieces are in place I put a strap around everything – that’s the black band in the picture.  I cinch the strap then insert blocks of wood around the perimeter.  The blocks help to make up for the different lengths of wood and give added clamping pressure.  Then I wipe all the excess glue away with a damp cloth.

Happy Bungalow Wood Clock Process 06a Walnut Cherry Wet Glue

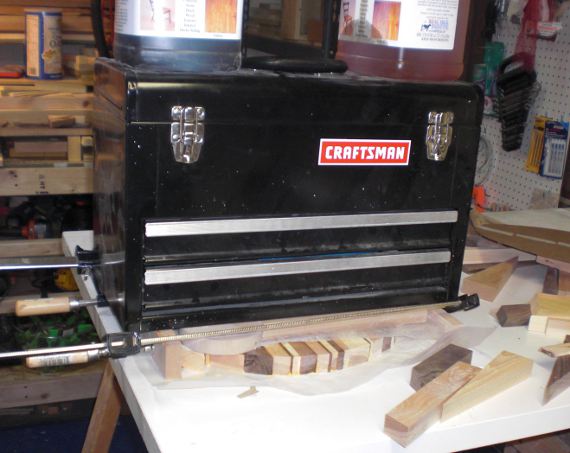
Next comes another sheet of wax paper and some MDF spacers to clear the wood blocks on the perimeter.  I pile on my heaviest tool box and anything else that’s heavy and handy.  This weight keeps the pieces flush.  You can see some glue squeezing out on the sides – but this isn’t a problem as the clock will be trimmed later.

The picture shows a wood-strip clock being glued up – more on that below.

The clock dries for a while before the weight is removed.  You can see a little glue that leaked through, but it’s nothing a little sanding won’t clear up.

Happy Bungalow Wood Clock Process 07 Walnut Cherry Glueup

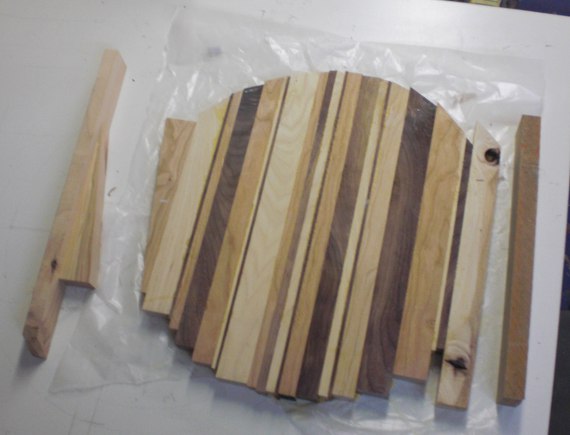
The picture below is one of the wood-strip clocks.  It’s like the other clocks except it only has one angle, so there’s much less math involved.  I lay out the strips, then cut each strip roughly to length so I don’t loose any more wood than necessary.  On the left you can see a rejected angle piece and a buddy angle that I used to clamp everything together.

The strip clocks don’t need the belt clamp – just a pair of bar clamps (and the heavy weight on top).  More on trimming, sanding, and finishing in the next post.

Happy-Bungalow-Wood-Clock-Process-09-Strip-Clock-Post-Glueup

Read the next post in the series here

Wood Clocks Process #1

Hardwood Clocks are in the works here at the Bungalow and I’m here to give you a behind the scenes tour of their construction.

At first I made templates for the clocks out of cereal boxes.  I figured I could mix and match angles, colors, and the like to make pleasing compositions.  I took out my compass (hand drafting isn’t dead yet) and cut out 40 or so different angle templates.  Then I mixed and matched until the angles added up to 360 degrees (see below).
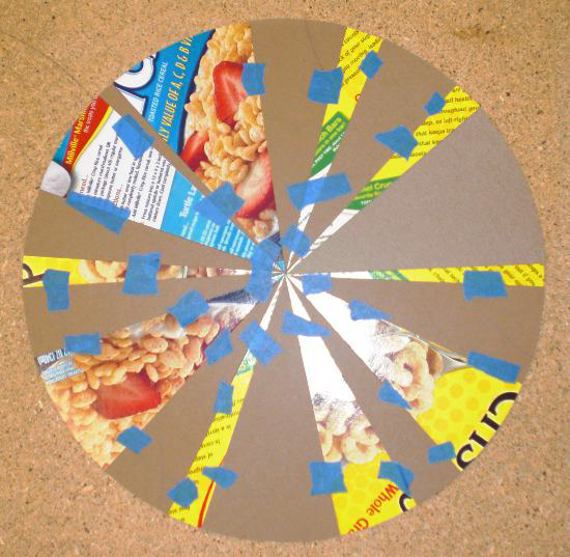
Happy Bungalow Wood Clock Process 01 Cereal Box Template Layout

Now I could be assured my cut pieces of wood would form a perfect 360 circle.  All I had to do was transfer the exact angles to select pieces of wood and cut those angles exactly with no margin for error.

Laying out the templates on the wood went well, after that things sort of fell apart.  I selected five different woods for the first clock (from top to bottom in the picture) – cherry, hickory, walnut, red oak, and poplar.
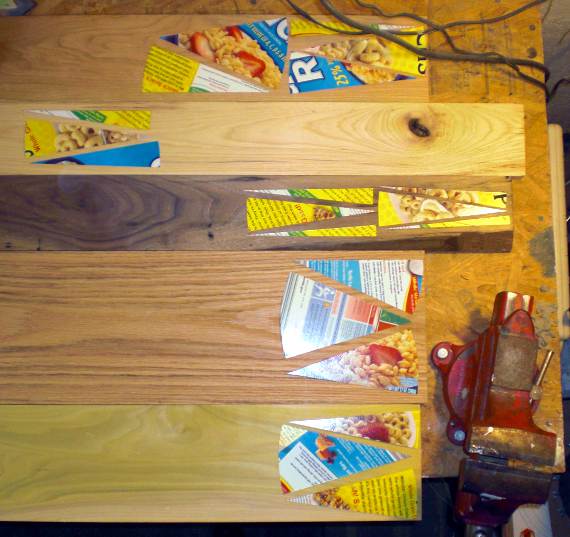
Happy Bungalow Wood Clock Process 02 Template Layout On Wood

I transferred the angles to the wood with a pencil, cut the pieces to length on the miter saw then turned to the tablesaw.  Here is where my grand plan began to unravel.  Just how do I cut those angles with no margin for error?  I looked around for a laser wielding robot, but I don’t have any in the shop.  The best I could come up with was to fall back on high school geometry.

I cut small pieces on the tablesaw with a sled that slides on the top (and keeps my fingers far away from the blade) – see below.
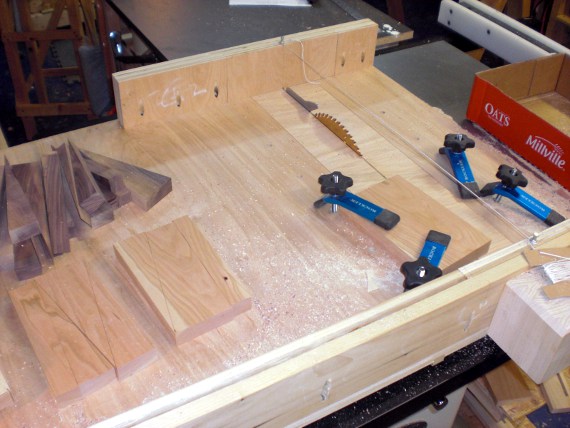
Happy Bungalow Wood Clock Process 03 Cutting On Tablesaw

The sawblade leaves a cut line the exact width of the blade (handy) – this forms one side of a plane.  Directly above this line I attached a string that I could site the angle of the cut – forming the second side of a plane.   Line up the sawblade, the pencil mark on the wood, and the string – and the wood will be cut exactly.  Assuming the pencil line intersects the blade/string plane exactly.  You can see this in the picture better.
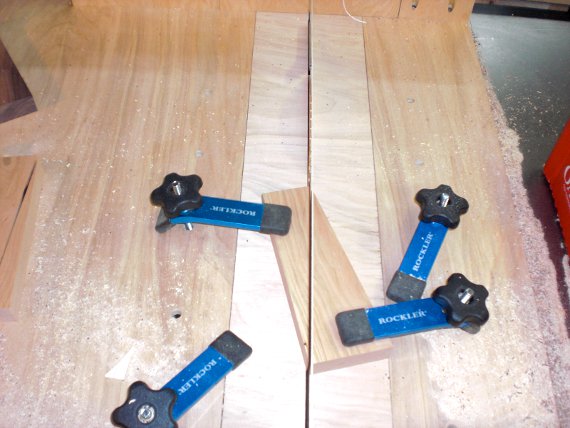
Happy Bungalow Wood Clock Process 04 Cutting Segments On Tablesaw

Of course no matter how “well” I eyeballed it, the angles couldn’t be cut exactly so I ditched that plan and just cut a load of different angles, figuring if I had enough angles I could put together a circle later.  You can see the blue clamps in the picture above – super handy for holding the wood in place securely and keeping me as safe as possible.

Below you can see stacks of the cut wood.  On the top are pieces of walnut.  The lower left is hickory and the lower right is cherry.  With the cherry you can see how I make the cuts – rotating the wood to keep the grain in as radiating a pattern as possible.  In the next post I’ll talk about layout and glue-up of the clocks.
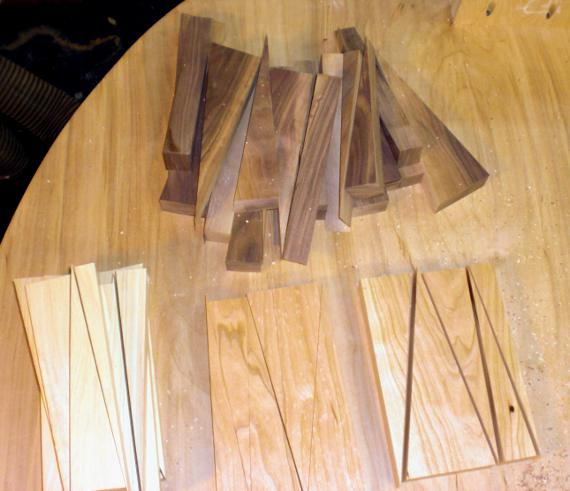
Happy Bungalow Wood Clock Process 05 Wood Segments Laid Out Post Cutting

Read the next post in the series here