The Making of a Wood Optimus Prime
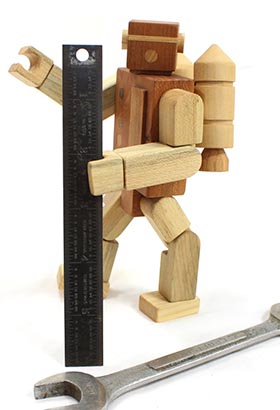
How do you recreate in wood an iconic childhood toy? With a little bit of wood, some sandpaper, great attention to how close your fingers are to a sawblade, and time. Lots of time.
How do you recreate in wood an iconic childhood toy? With a little bit of wood, some sandpaper, great attention to how close your fingers are to a sawblade, and time. Lots of time.

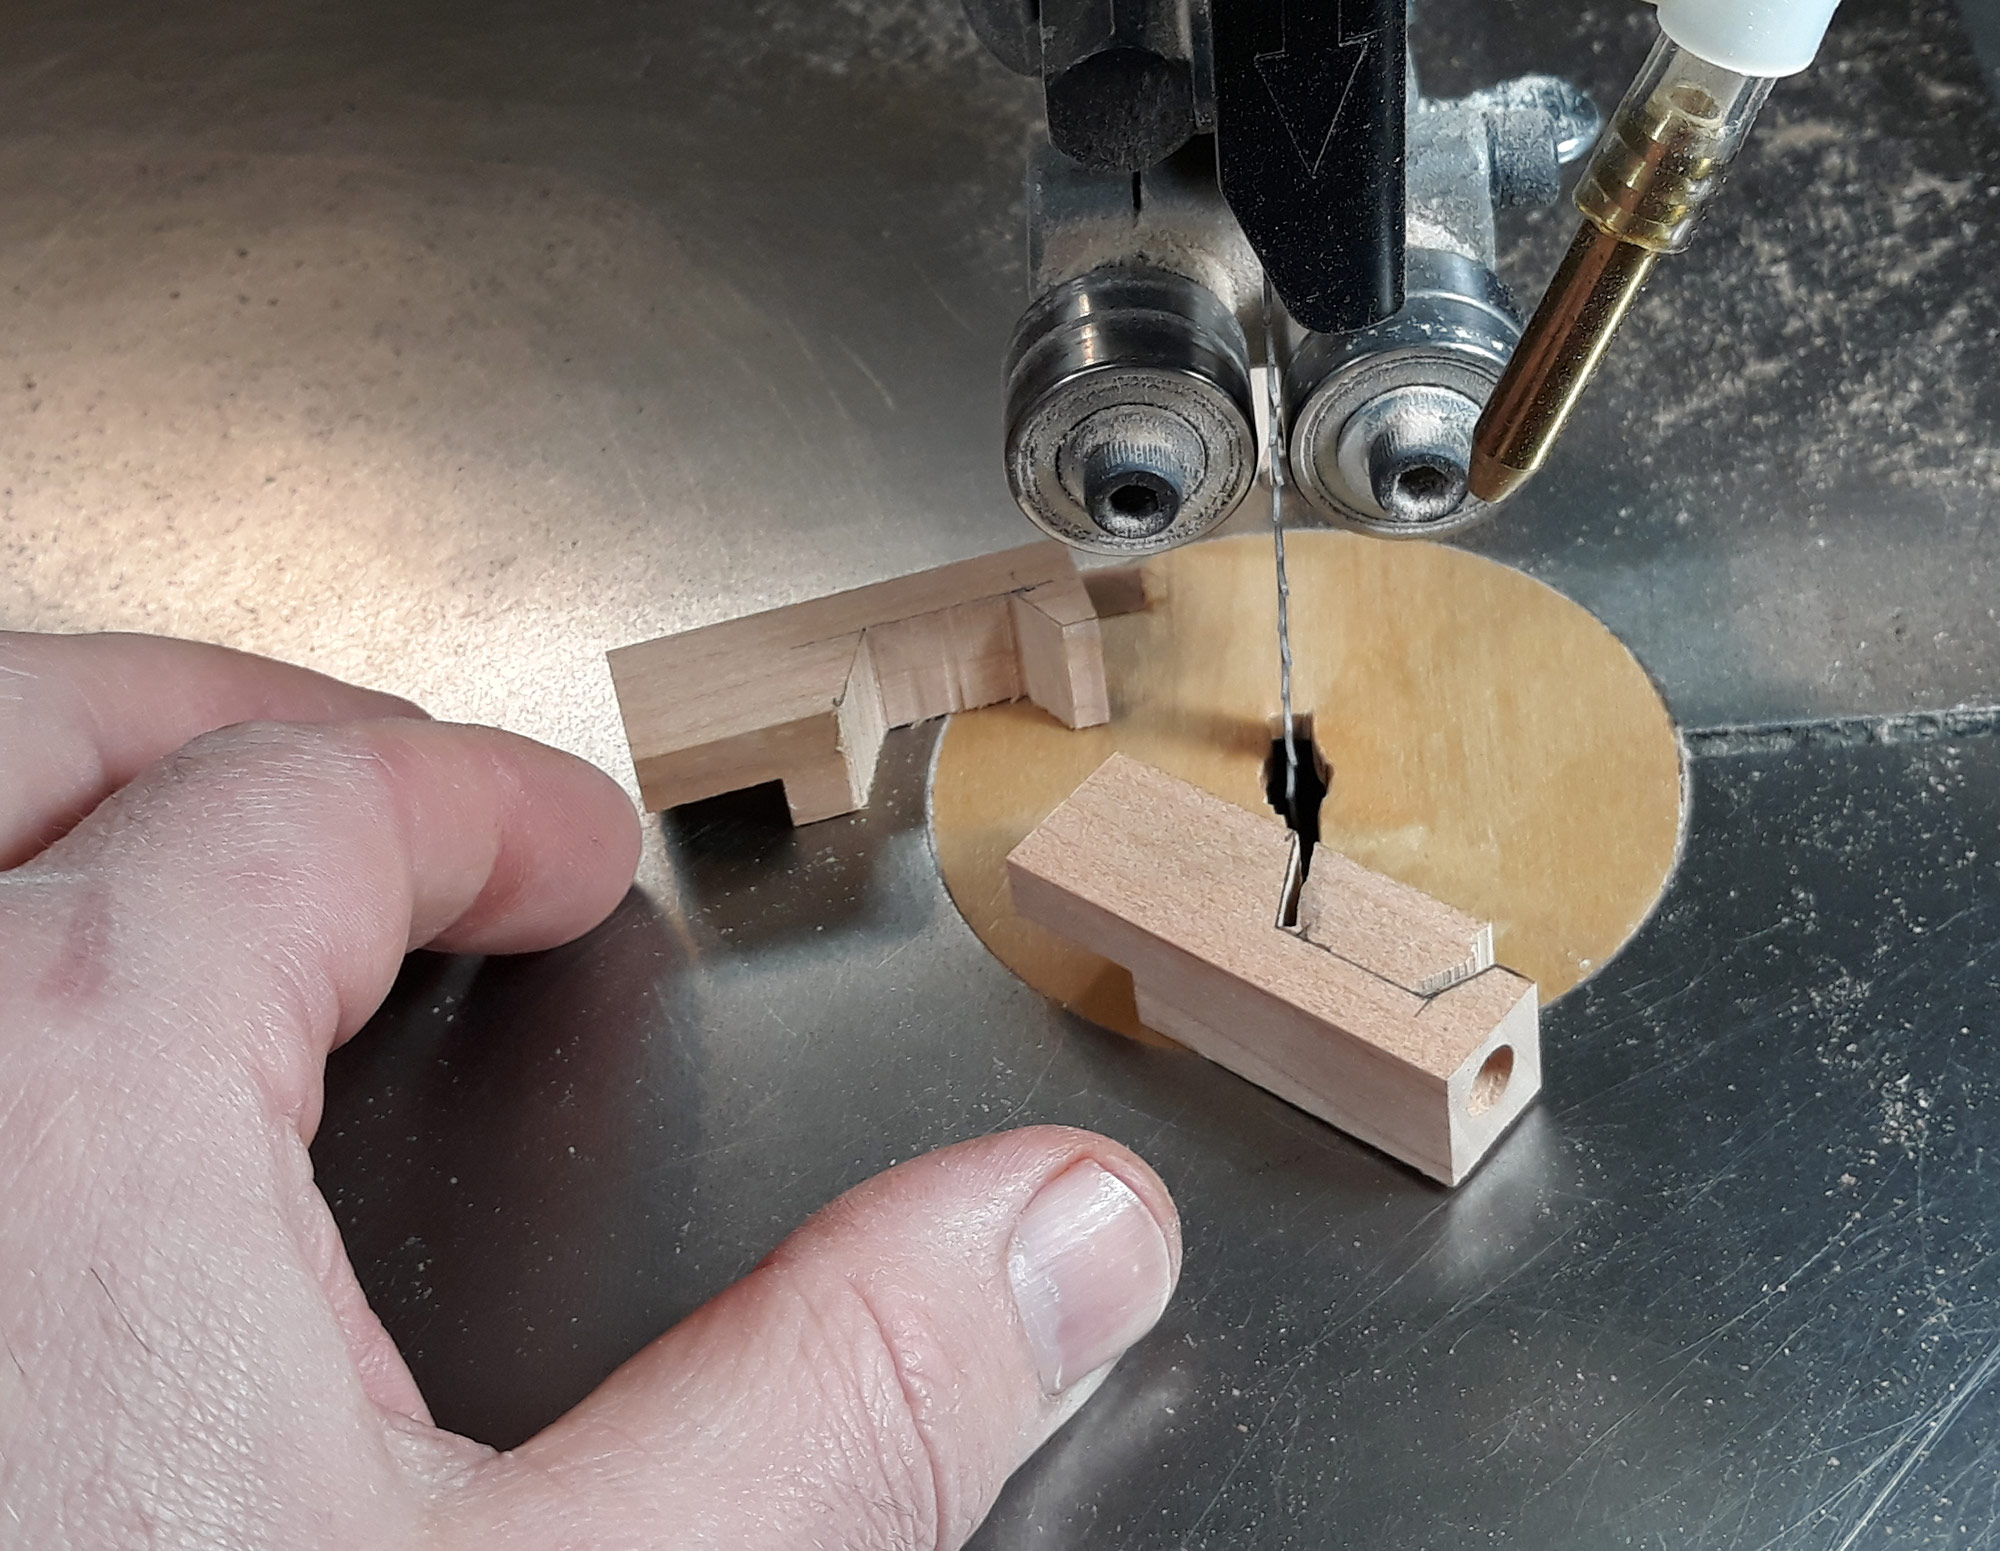
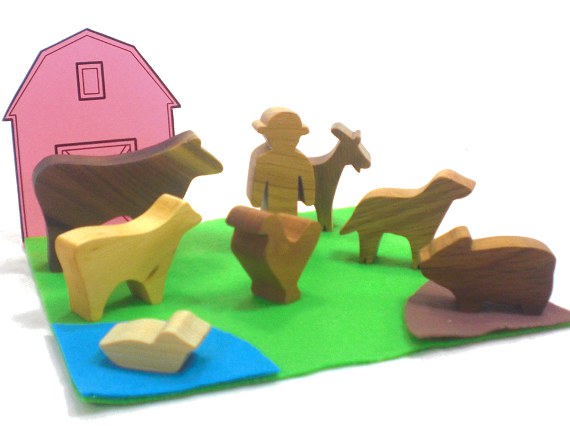
Today we throw it back to just about the first Happy Bugnalow toy ever prototyped. I think it was just about the first thing I ever made on a scroll saw. This was made when Happy Bungalow was just starting up. We were ordering a few pieces of new professional grade equipment, but still trying to make it by on the thinnest shoe-string budgets. So this little animal was cut on a piece of pine that was hanging around the shop.
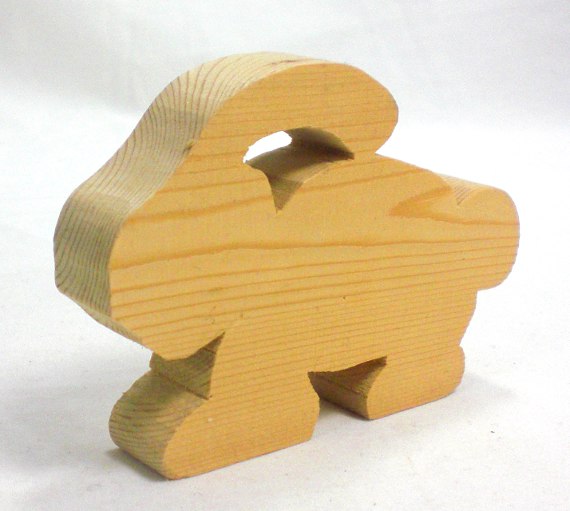
I drew from (cartoonish) memory the shape of the animal. I was happy that others recognized the shape was a bunny, but disappointed in how lame the thing looked. So I set about drawing animal profiles from real animals (usually from pictures, but occasionally from real life as in our bison toy). When we fist started there were two primary animal lines: farm and safari.
Since we’ve added to our shop woodlands animals, dinosaurs, and mythical animals (think unicorns). In addition we’re working on adding water animals, Australian animals, and just about every other animal that can be rendered in wood.

Reproducing real life animals into small wooden form took some tweaking. Legs were too thin, bellies to bulgy, and the like. Legs are the biggest problem. Like, have you ever seen how thin a horse’s legs are? Or a chicken’s? In the beginning there was a lot of tweaking and fussing to get the animals just right, but now, I think we’ve made close to one hundred different animals so far, we usually nail it down pretty quick.
So kids, remember – what they say is true. Practice Makes Perfect! Or just a lot better.
Last time on Throw Back Thursday . . .
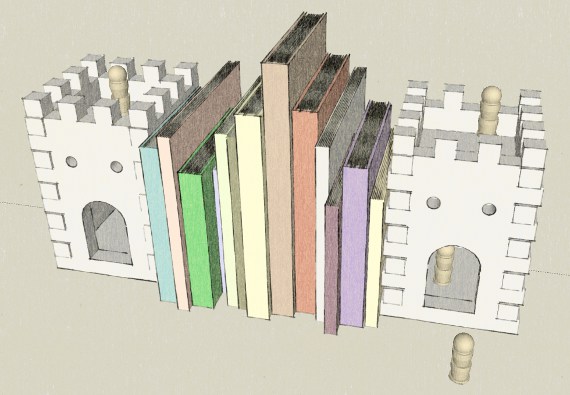
We dug up an early prototype of a castle bookend. Well, here’s the computer model that preceded it. Pretty neat looking, and probably pretty fun too, but none of them ever made it into production (read more about why in the original post).
I’ll ramble on a bit about computer models and prototyping. We do all of our 3-D models in Sketchup. It’s a free program that is super-handy, and relatively easy to learn. I’m not the best self-taught computer person, but I figured out the basics of Sketchup in a day or so. A few projects later and I was competent enough to do interior architectural models (I wasn’t always a toy-maker you know). With computer models you can know exact dimensions, work out potential problems, and generate cut lists (how many and how long of pieces of wood you’ll need).
Though, I like to work on the fly, working from simple sketches and physical protoypes (see an example in a post about toy car design and a bit about toy car construction). So we don’t produce too many digital models anymore. I will say though, if we were working on any sizable pieces, we would turn first to a computer model.
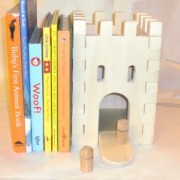
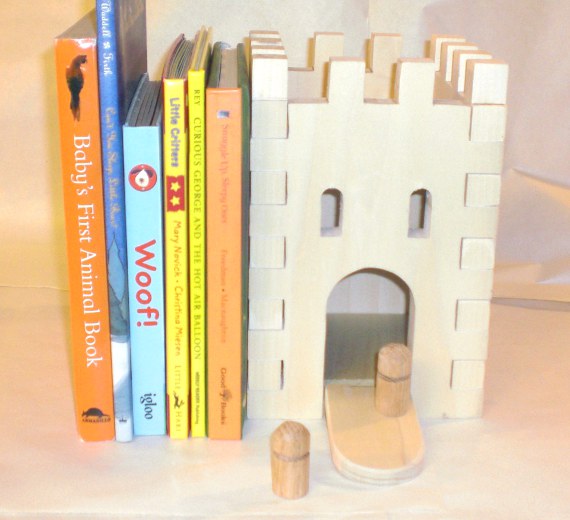
You can see in the built prototype that most everything is the same as the digital model. The little dowel people were simplified and the upper windows were more real, but the physical castle was the same. I probably went through 5 different hinge types for the little draw bridge. That was tricky.
The Kids ended up with the castle prototypes, there’s a half dozen of them. So we would hook all the individual wall pieces together (nothing was glued) and make super giant castles. Never a roof though. Inside the castle would sleep cars, princesses, blocks, and whatever else was around. This was in the days when our oldest was figuring out how to go to sleep in a big kid bed by herself, so a lot of play time was devoted to putting her toys to sleep.
Liz and I don’t miss those battles of getting the two year old to go to sleep at night, but we sure do miss that play-time. In case you’re wondering, we have discovered the secret to getting little kids to sleep at night – give them a sibling to sleep in the same room with.
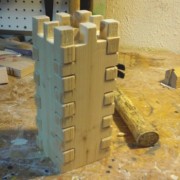
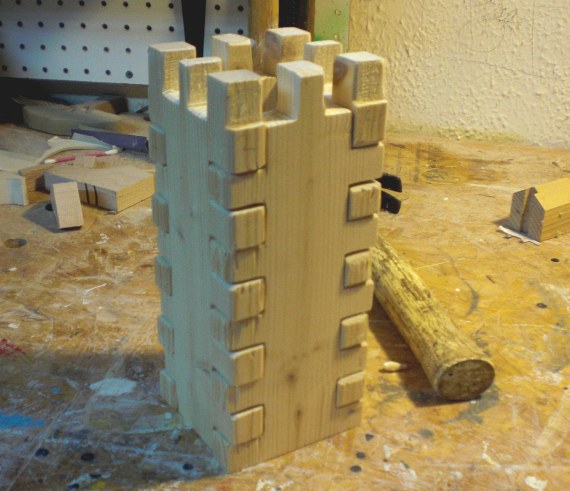
In recognition of Throwback Thursday we post this old prototype. It’s one of about a dozen attempts at creating castle themed bookends. I never figured out how to make them to the level of quality we strive for, and for the price we thought they could sell at. The idea was for the bookends to be playable toys, outfitted with simple dowel people (much like the little peg people you see everywhere).
Perhaps we need to go back a little further.
Before Happy Bungalow was Happy Bungalow it was Kiddie Kottages. When Liz and I were first dreaming up this business we were going to create playhouses for children (spurred on by the encouragement of friends, see the playhouse here). We made notes and sketches. We created 3D models of the playhouses. We thought up just the right business name and registered domains (until recently kiddiekottages.com and kiddiecottages.com redirected to happybungalow.com).
And then we thought up some little products to accompany the playhouses. The idea was that we’d make the playhouses and everything you needed to put in them. So the original Happy Bungalow product line started out as accessories to Kiddie Kottages’ big playhouses. But starting a new business and creating these multi-thousand dollar playhouses was too much, so we focused on the smaller pieces at first with the goal to move on to playhouses later.
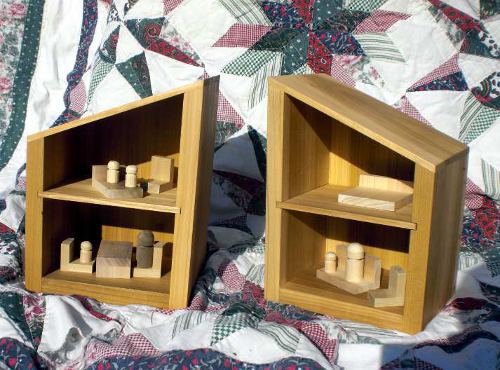
We’ve pretty much given up on the playhouses for the immediate future, but some of those original products still hang on (our wooden animal toys being the most notable). Much like the never realized castle bookends, the dollhouse bookends below went through extensive prototyping (and before that digital models you can read about here), but end the end it was hard to find a workable price-point for them. It was also difficult to generate the level of quality (again at workable price point). Though the shop has expanded its tooling, we might take another attempt at it.
The simple little furniture did prompt a friend to ask if I could make some furniture for her daughter’s inherited dollhouse. Well, that is a product line that has done quite well (read more dollhouse furniture posts here).
So in the end the castle bookends never made it into production. The corner joints (box joints) were the problem. I was attempting to create a faux quoining (fancy architecture word for those stones that stick out on the corner of buildings). Perhaps one of these days . . .
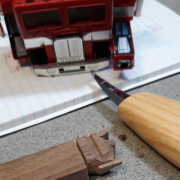
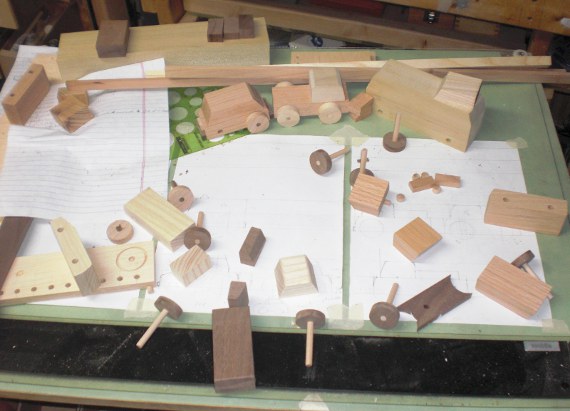
Well, I don’t know just how many steps there are, but I bet I’m close. We make our toy cars and trucks like any other toy we make: Quizzing The Kids about what they’d like to see in a new toy. Then come some sketches which they usually don’t understand, but are enthusiastic to support. Next comes some hand-drafted drawings (see picture below) and the first round of prototypes which The Kids understand well.
( You can see the first prototypes in the picture below in the center towards the top of the drafting board. )
So the Kids play with the prototype cars for a while and then we hold a panel review session. It goes something like this:
Me: “What would you say you like most about this product?”
The Kids: “They’re great! Too cool!”
Me: “What would you say you like least about this product?”
The Kids: “They’re great! Too cool!”
This feedback really helps to inflate my ego and solidify my position as Most Awesome Dad.
I play with The Kids, see what other toys are invited to play with the new group, and keep an eye out for rough play that might reveal weaknesses. Then I take the toys back to the shop for simulated play and abusive testing. Weaknesses are corrected and the design/look of the toy is usually tweaked.
Then it’s on to figuring out how I’m going to build these things. It’s one thing to build a one off toy for the fun of it, it’s another thing to make quality toys for a price people are willing to pay. It’s a long process and quickly drifts into the weeds of specifics . . .
 . . . so we’ll shorten it up a bit . . . a stack of wood is planed, cut, sawn, cut, sawn, and cut again. And here at the Bungalow we use hardwoods – not a 2×4 (aka pine, spruce, or fir). These cars are made from red oak, ash, walnut, and hickory. Tough enough to be played with by three year old boys and strong enough to survive a random gnawing by a little brother.
Once all the piece are cut, they’re neatly stacked (see above). All the cars have a base and a top, are the same width, mostly the same length, and are all cut with complementary angles. Every car gets two holes drilled for axles (see below) and one small hole on the bottom where the tow truck can hook onto. I use a custom-made adjustable jig for all the drilling.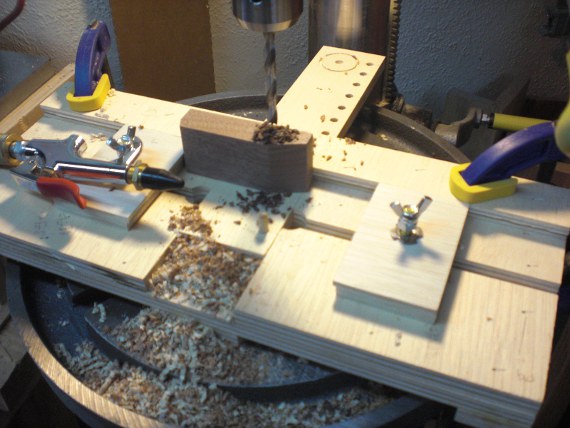 This operations piles up the saw dust – I depend on my compressed air hose to keep the work-surface clear. I drill and drill and drill and drill. You might think drilling holes for an hour or more is boring – but you’re wrong. I get to sit on a stool while I do it. It’s hard to be bored in the shop when you’re feet are happy.
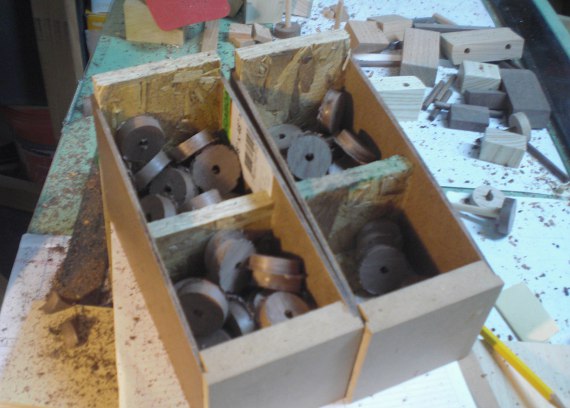
All Happy Bungalow cars are equipped with Strong Ox tires, mfg. Cincinnati, Ohio. They’re cut with a special hole saw. The wheels are made from walnut, unlike most wood toy cars you see which are made from a lighter toned wood (maple or beech) and look suspiciously similar. Our axles are cut from walnut dowels.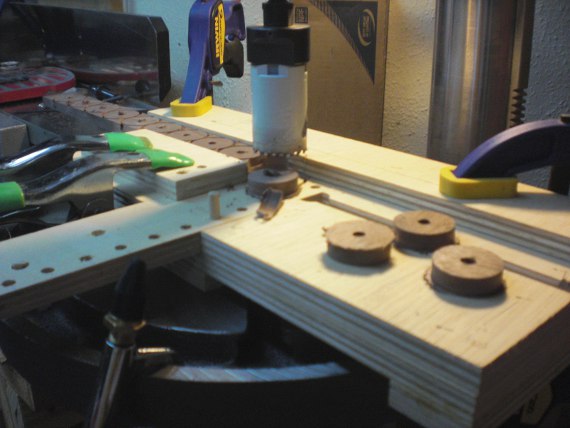 By now there’s a stack of car parts that need gluing, sanding, gluing, sanding, sanding, a smidge more sanding, and finally some natural wax finishing. I use power sanders, but a lot of the sanding work is done by hand. All corners are smoothed over – no sharp edges are left to pester little hands. I cringe to say this, because it sounds like some lame marketing line, but I do pride myself on craftsmanship. Well made, well detailed, and finely finished.
 See the end results here. And take home your own car from our shop here.
People ask me if I live in a happy bungalow. 95% of the time. Here’s proof:
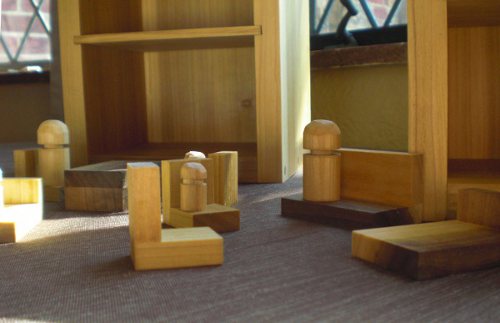
A mixing of the toy worlds! Not only are Happy Bungalow toys mixing with those rascally store bought toys, but if you look closely you’ll see cars taking a snooze on some dollhouse beds. So here are some castle prototype parts, dollhouse bookend furniture pieces, a wood fairy, along with some old Legos of mine, and loads of toy cars.
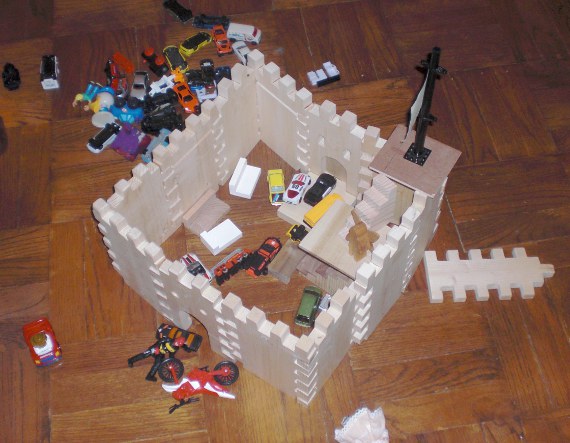
The castle is built from Castle Bookend prototypes that predate the official launch of Happy Bungalow. I wasn’t able to quite work out the mechanics of the castle. Maybe we’ll take another look at it some time.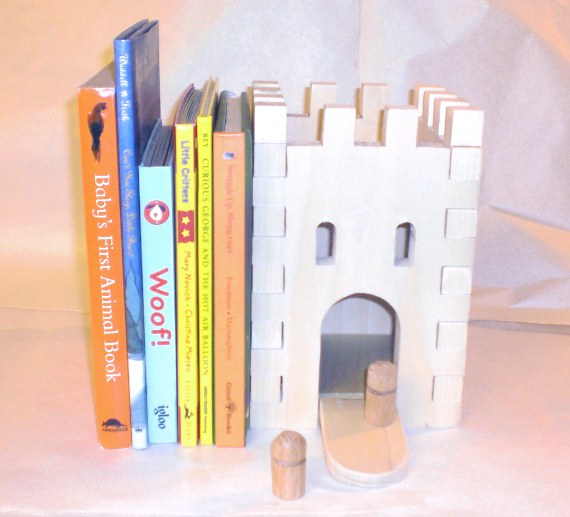
I’m working on packing some of my animals and people into story-book collections. Little Red Riding Hood, Three Little Pigs, Old MacDonald, Ugly Duckling and the like. All the stories that are in public domain so there’s no worries about copyright infringement. So I found some older versions of the stories (thinking the turn of the century wording would have a nostalgic twist). Good grief are they violent. 
You can probably figure how the Three Little Pigs or Little Red Riding Hood works out – brutally. Though it was sort of nice (?) to see one of the pigs win in the end. I guess. Still, it was all vicious stuff for my pre-schoolers just before bed. And I will not have the wolf in either story be a vile character – I’ve read my Aldo Leopold.
There’s even plenty of violence where you’d wouldn’t expect it.
Little Bo Peep:
“LITTLE Bo-Peep has lost her sheep,
And can’t tell where to find them;
Leave them alone, and they’ll come home,
And bring their tails behind them.
“Little Bo-peep fell fast asleep,
And dreamt she heard them bleating;
But when she awoke, she found it a joke,
For they were still a-fleeting.
“Then up she took her little crook,
Determin’d for to find them;
She found them indeed, but it made her heart bleed,
For they’d left all their tails behind ’em.”
Why do their tails have to be cut off? I always thought, “leave them alone and they will come home, bringing their tails behind them,” a sweet line – I never imagined the tails were physically cut off.
Some stories are violent and mean. Clearly the Ugly Duckling was tamed down in my kindergarten class. The bullying I remember was bad enough (terrible in the original), but also in the original is a passage the ugly duckling finally makes some friends and then they’re instantly shot by a hunter. Why?
Even baa baa black sheep. Have you any wool little sheep?
Quote the black sheep:
“”Yes, marry, have I,
Three bags full:
One for my master,
And one for my dame,
And none for the little boy
Who lives down the lane.”
Phh . . . Why none? You have three bags you stingy sheep? I say bag the original text (pun intended). I’ve rewritten it:
“Yes, marry, have I,
Three bags full:
One for my master,
And one for my dame,
And the best one for the little boy
Who lives down the lane.”
So I’m in the process of rewritting a lot of these old tales. I’ll keep some of the text, but most is headed for my computer’s recycling bin. The world is violent and mean enough – children will be exposed to it all and yes, I’d like to keep them from it as best I can.

I’ve had loads of rave reviews about the new Happy Bungalow robot line (fingers crossed for more). As such I’ve been working on expanding the line. First up are prototypes SC”OUT and DOG I’m working on the back-stories for each.
My wife commented that the DOG robot looks a bit like a sheep. HA! How about Sherpard’s Helper Electronic E-something Protection? I don’t have the name fully worked out, or a working prototype, but I have the backstory – it’s great, but you’ll have to wait.
 SCOUT isn’t an anagram – just a name. It’s another XyThanP Corp robot (like the XR14-J). I believe it’s another XR model – single digits probably, but I’ll have to confirm that. XyThanP Corp’s PR department has been tight-mouthed of late. I think it has something to do with the mining equipment scandal, but that’s just my opinion. I hope to secure more information soon.
Missed the creation of the clocks? Read part one, part two, and part three.
Hooray! The hardwood clocks are finished (get it? finished?), their dials have been painted, the movements installed, and the hangers hung. Shown below is a strip clock (I’m open to catchier names) and the oh-so-cleverly named five grain clock (five different types of wood). None of the wood was stained – the colors you see are natural.

A closer look at the five grain clock. The darkest wood is walnut and the lightest is hickory. The greenish wood is poplar. The reddish wood with the wavier grain is cherry, and the reddish wood with the tighter grain is red oak. The dials are metal and hand painted with yellow enamel paint.

The strip clock only has three woods. The dark is walnut and the lightest is hickory. Cherry is the friendly red. Once again, the dials were hand painted yellow.

Below is the rear of the five grain clock. Each clock has three separate hangers so you can mix up the position of the clock. Of course after I attached the hangers I discovered you can’t willy-nilly put on the hangers – Twelve O’clock doesn’t coordinate with any position. After some dial spinning and head scratching I figured it out and repositioned two of the hangers. Oops (these clocks will have a discount in the etsy shop).
All of the woods are labeled on the back – no need to be a wood expert to impress your friends. “Yes, this is cherry, and that is hickory.” The clock crafted date and signature is listed as well.

http://happybungalow.com/blog/2011/09/22/wood-clocks-process-3/
In the previous post our wood clocks were dry-fitted and glued-up (read the post here). You may remember some dried up glue that leaked out of the joints. The glue was knocked away with a sander as were any wood segments that were higher than the others. Despite the best efforts of the heavy took box, some of the pieces moved up oh so slightly. Ideally I’d run the clocks through a planer (mine isn’t wide enough) or a wide belt sander (nobody has dropped one off at the shop). So I sand them down with a 1/3 sheet sander.

The next step is to trim up the clocks. I lay out the circle with my drafting compass (in the upper right in the picture below) and lay out a circle as big as the smallest wood segment. In short – I make the clock as big as I can. I trim the circles on the bandsaw, sand the edges smooth on a stationary belt sander, and bring them back to the table.
You can see how much sanding dulls the look of the wood. I plane all my wood in the shop (three giant knives spinning really fast and slicing away wood) – which leaves the wood ultra smooth. Sanding also smooths the wood, but instead of slicing the wood, the sanding compresses the grain of the wood, so it doesn’t look as crisp. But don’t worry, we’re going to fix that during the finishing.

There’s one last step before the finishing – cutting holes for the clock movement (the gizmo that turns the clock hands). I start with drilling a small hole through the center on the front. Then I drill a big hole in the back (I’m thinking the Bungalow’s resident hamster may find some use for them).
This part’s a little tricky – drill too far and the clock is ruined. Drill not far enough, and well – just drill some more. Fortunately my 3-1/8 inch drill bit isn’t very fast. Notice the clamps in the picture. The clock must be clamped to something secure as the large drill bit creates a lot of torque.

Now the fun part – finishing. I finish the clocks with pure tung oil – which penetrates the wood to protect it. Pure tung oil is a legitimate natural finish. The only thing in my tung oil? Tung oil. There’s no laundry list of additives and chemicals on the side of the jar. The only thing I add is citrus solvent which thins the oil to aid penetration into the wood.
Citrus solvent? It’s natural too – derived from oranges. And it smells great – the whole shop smells like oranges. The tung oil gives the wood a lot of pop and shows off the grain well.
Grain? The upper left clock has alternating segments of walnut and cherry. The lower clock has cherry, walnut, poplar, red oak, and hickory. The strip clock has hickory, walnut, and cherry.

Read the fourth and final post here