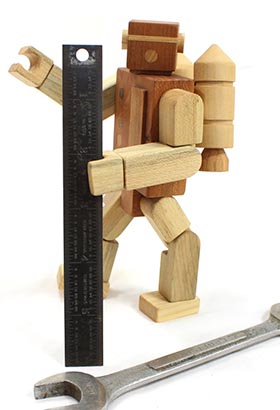
The Making of a Wood Optimus Prime
How do you recreate in wood an iconic childhood toy? With a little bit of wood, some sandpaper, great attention to how close your fingers are to a sawblade, and time. Lots of time.
How do you recreate in wood an iconic childhood toy? With a little bit of wood, some sandpaper, great attention to how close your fingers are to a sawblade, and time. Lots of time.
Just because you make it, doesn’t mean they’re going to buy it. Say like you make 300 and some odd little toy train accessory buildings for your first craft show (that’s modestly attended by the way). Let’s say you make all these buildings. Not everyone wants to buy them. You can worry all you want that you’re not bringing enough product, but there’s no need to. YOU WON’T RUN OUT.
Ok. I didn’t expect to sell 300 little buildings at my first [small] craft show, but there was like 12 different kinds of buildings, so there’s only 20 of each type . . .
We’ve had big runs on one items at shows before. You know, big shows in the Fall when people can’t buy enough cool toys.
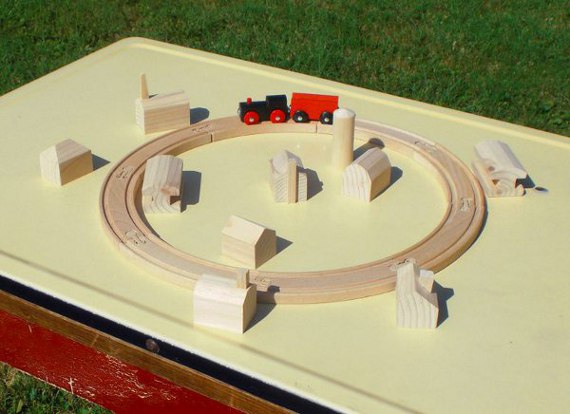
The train buildings were one of the first Happy Bungalow toys. The thinking was: everyone sells those little toy train track and magnetic trains, but accessories are hard to find. And if you can find any buildings, they’re always painted. How about some plain and simple accessory buildings? Guaranteed to sell right? We identified a product missing in the marketplace. A NEED that all those business books always talk about.
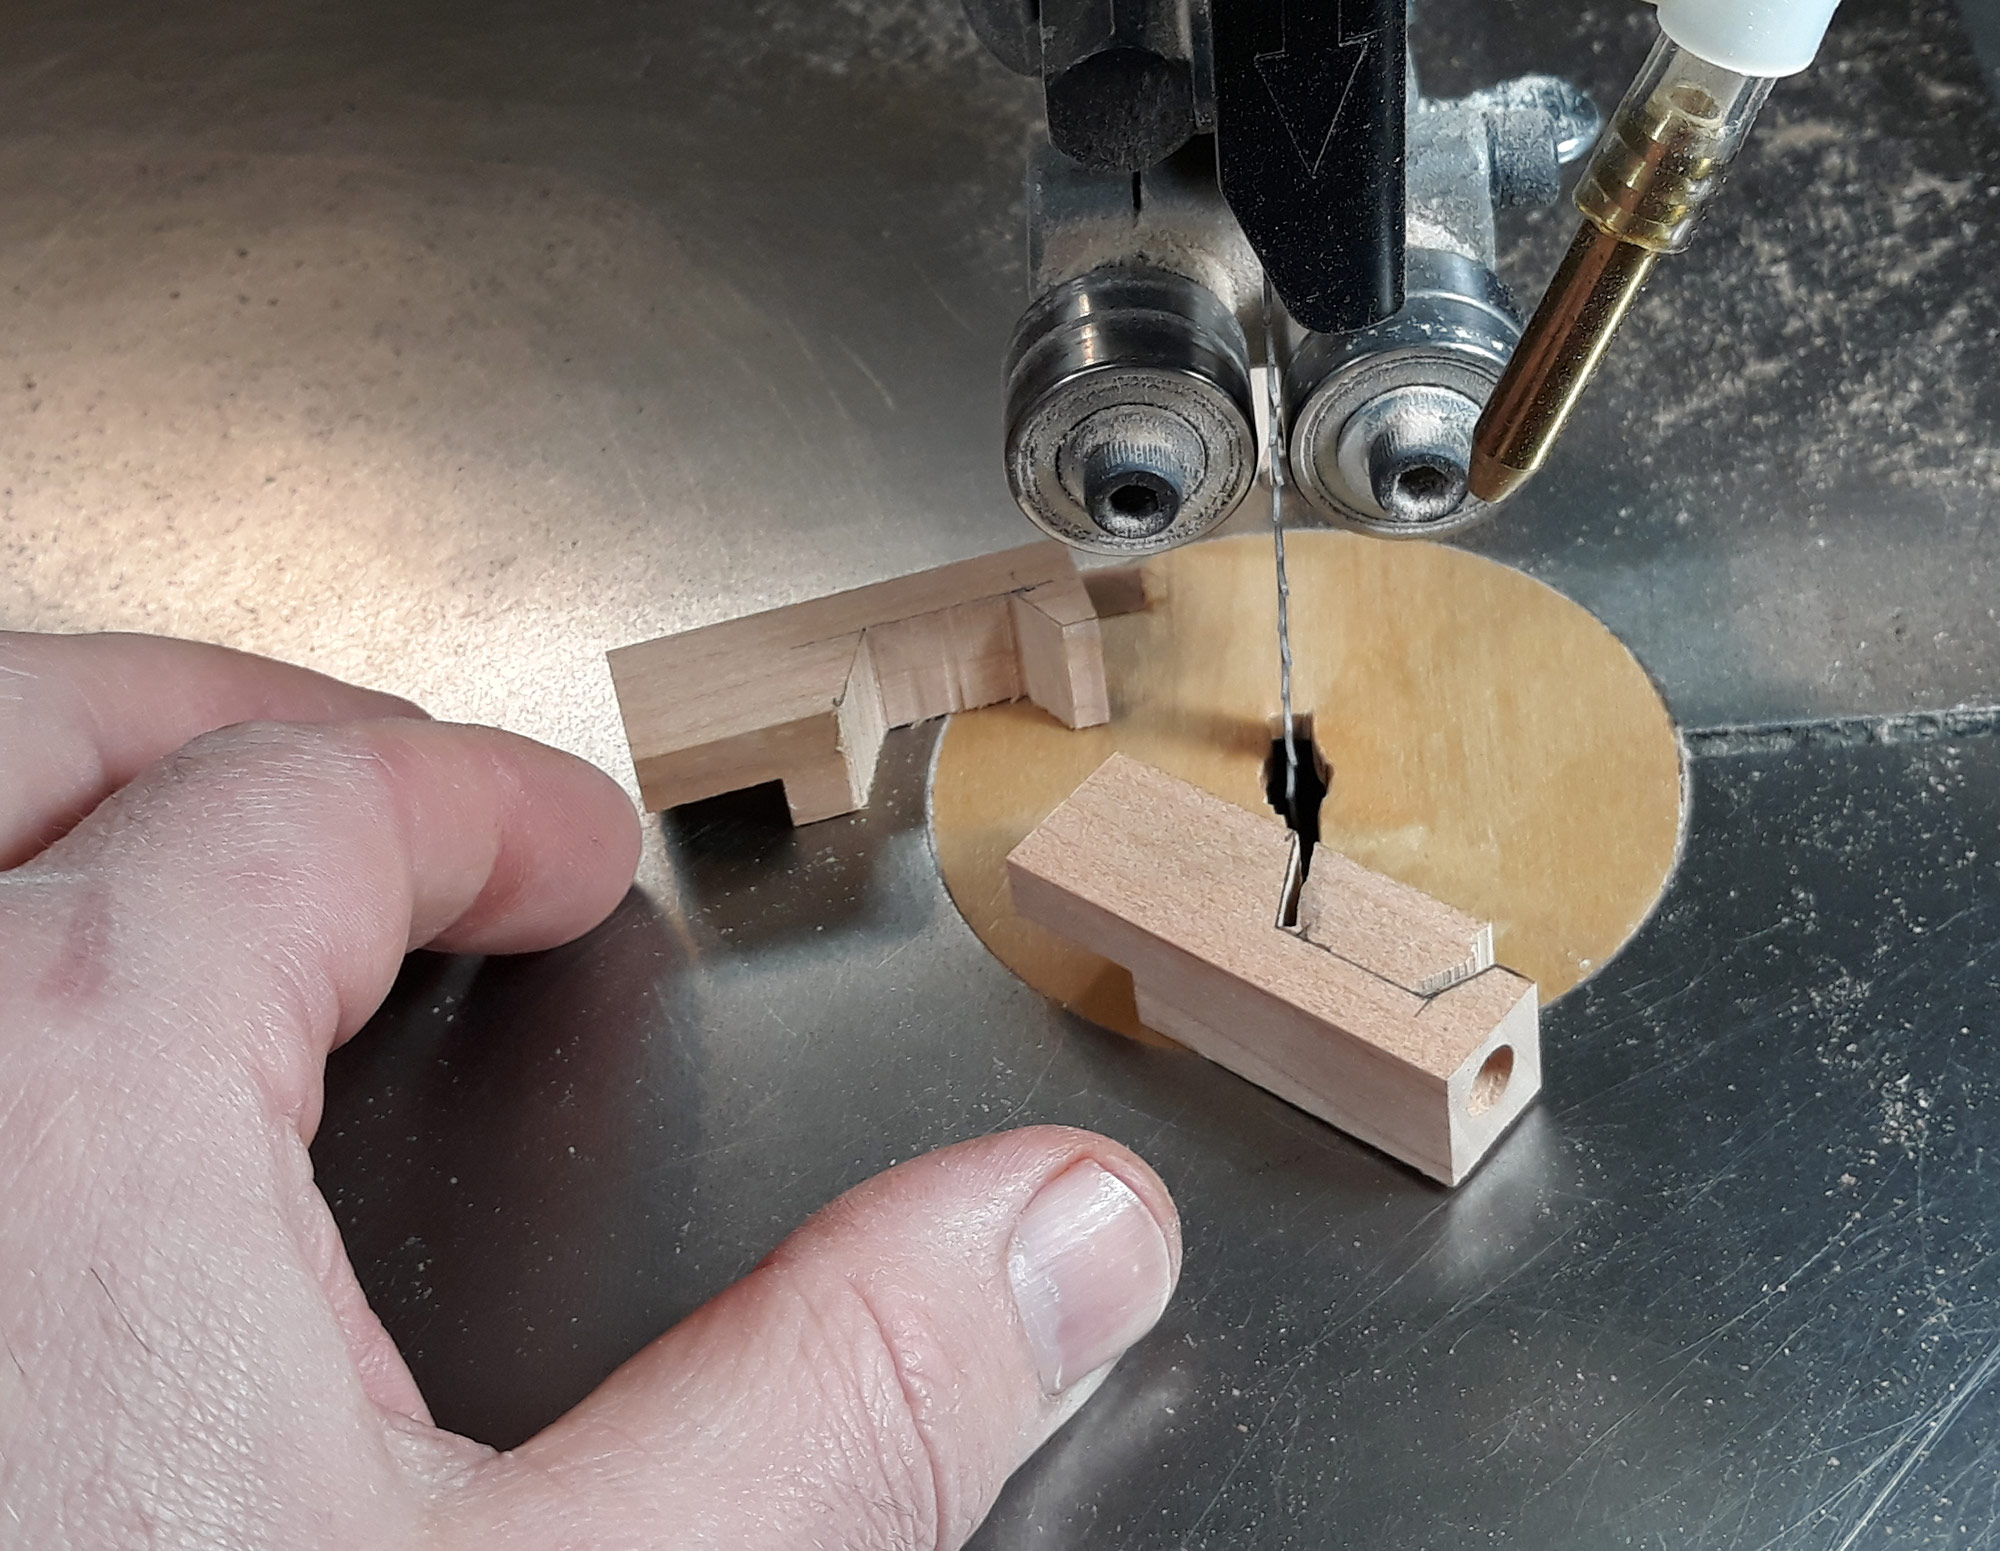
Being one of our first toy lines, it took a while to figure out just how to cut the wood safely. The saws in our shop cut fingers just as easily as they cut wood – and these toys are so small – and if you don’t/can’t hold the wood firmly in place it will fly away from the machine at high speed. So once we figured out the techniques and process we maximized our tool setup overhead and ran off a few hundred buildings.

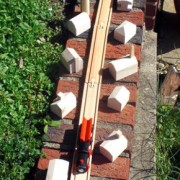
For our first show we put together a train demo display on the ground for the kids to play with (see below). Then on the table above we lined up a few dozen of the buildings. We really fussed over the best train layout too. Probably went through a half dozen configurations beforehand (don’t miss those days). So it was a lot of work, you follow? And did it pay off? Did it pay off?! The NUMBER ONE product people wanted to buy that day?
Yeah, the trains. The dumb old trains. The only thing on display that we didn’t make. [insert Charlie Brown hopeless sigh]
This was the first and only show the train and tracks were ever displayed at. The buildings come to shows from time to time, and they do well enough. Though we still have a box full of the suckers.
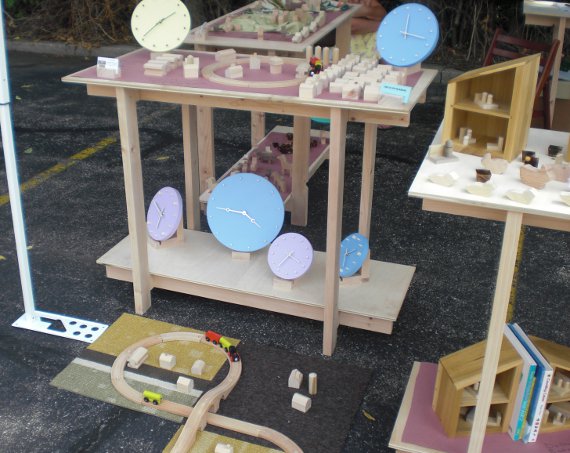
For all the fussing about the layout we did come up with a cool idea for the table toppers – using a sort of butcher paper that we wrote little product descriptions and prices on.
A note about the first two pictures. They were part of our first photo shoot. We drug furniture, ladders, props, and back drops out into the back yard. Spent and afternoon shooting hundreds of pictures and another afternoon editing them. Eek.
Read the rest of our Throw Back Thursday series here.

Today we throw it back to just about the first Happy Bugnalow toy ever prototyped. I think it was just about the first thing I ever made on a scroll saw. This was made when Happy Bungalow was just starting up. We were ordering a few pieces of new professional grade equipment, but still trying to make it by on the thinnest shoe-string budgets. So this little animal was cut on a piece of pine that was hanging around the shop.
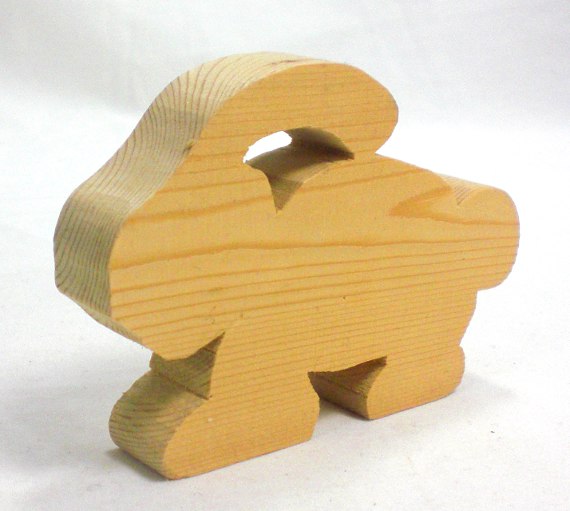
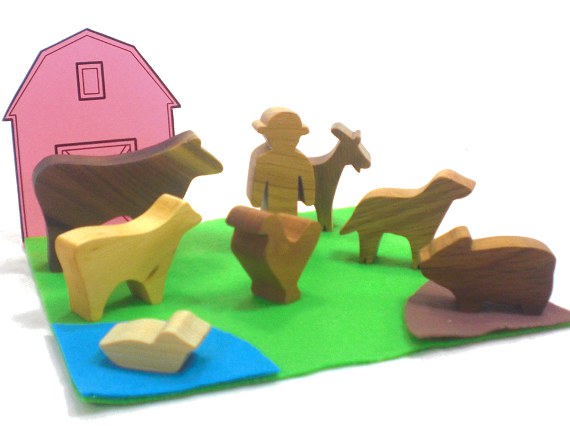
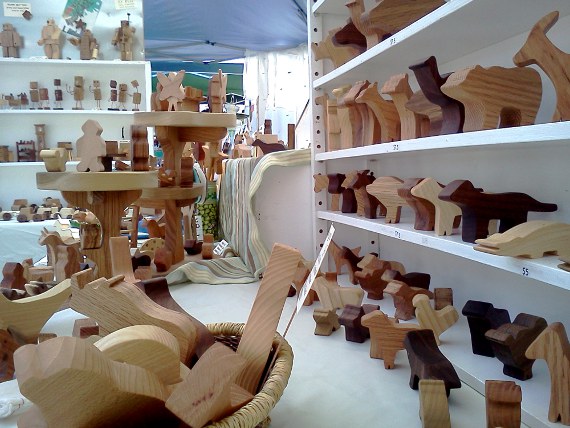
I drew from (cartoonish) memory the shape of the animal. I was happy that others recognized the shape was a bunny, but disappointed in how lame the thing looked. So I set about drawing animal profiles from real animals (usually from pictures, but occasionally from real life as in our bison toy). When we fist started there were two primary animal lines: farm and safari.
Since we’ve added to our shop woodlands animals, dinosaurs, and mythical animals (think unicorns). In addition we’re working on adding water animals, Australian animals, and just about every other animal that can be rendered in wood.

Reproducing real life animals into small wooden form took some tweaking. Legs were too thin, bellies to bulgy, and the like. Legs are the biggest problem. Like, have you ever seen how thin a horse’s legs are? Or a chicken’s? In the beginning there was a lot of tweaking and fussing to get the animals just right, but now, I think we’ve made close to one hundred different animals so far, we usually nail it down pretty quick.
So kids, remember – what they say is true. Practice Makes Perfect! Or just a lot better.
Last time on Throw Back Thursday . . .
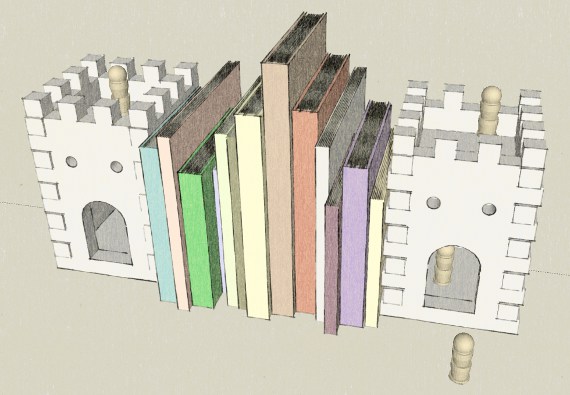
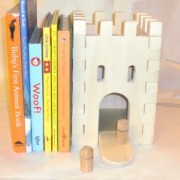
We dug up an early prototype of a castle bookend. Well, here’s the computer model that preceded it. Pretty neat looking, and probably pretty fun too, but none of them ever made it into production (read more about why in the original post).
I’ll ramble on a bit about computer models and prototyping. We do all of our 3-D models in Sketchup. It’s a free program that is super-handy, and relatively easy to learn. I’m not the best self-taught computer person, but I figured out the basics of Sketchup in a day or so. A few projects later and I was competent enough to do interior architectural models (I wasn’t always a toy-maker you know). With computer models you can know exact dimensions, work out potential problems, and generate cut lists (how many and how long of pieces of wood you’ll need).
Though, I like to work on the fly, working from simple sketches and physical protoypes (see an example in a post about toy car design and a bit about toy car construction). So we don’t produce too many digital models anymore. I will say though, if we were working on any sizable pieces, we would turn first to a computer model.
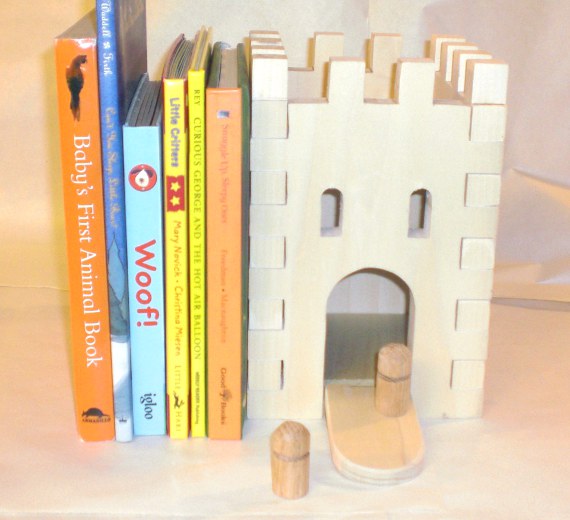
You can see in the built prototype that most everything is the same as the digital model. The little dowel people were simplified and the upper windows were more real, but the physical castle was the same. I probably went through 5 different hinge types for the little draw bridge. That was tricky.
The Kids ended up with the castle prototypes, there’s a half dozen of them. So we would hook all the individual wall pieces together (nothing was glued) and make super giant castles. Never a roof though. Inside the castle would sleep cars, princesses, blocks, and whatever else was around. This was in the days when our oldest was figuring out how to go to sleep in a big kid bed by herself, so a lot of play time was devoted to putting her toys to sleep.
Liz and I don’t miss those battles of getting the two year old to go to sleep at night, but we sure do miss that play-time. In case you’re wondering, we have discovered the secret to getting little kids to sleep at night – give them a sibling to sleep in the same room with.
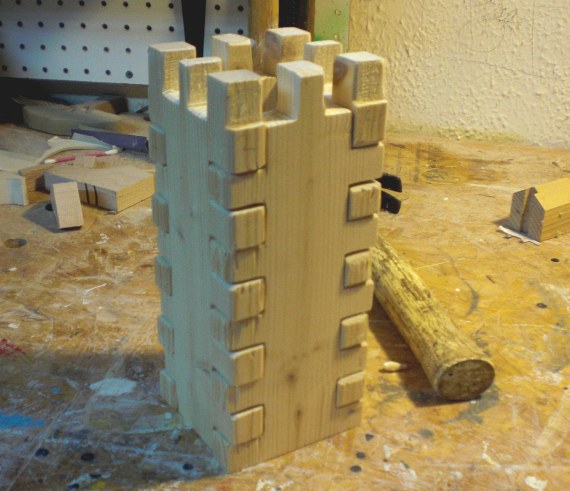
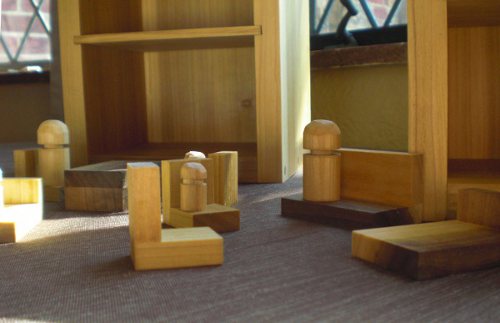
In recognition of Throwback Thursday we post this old prototype. It’s one of about a dozen attempts at creating castle themed bookends. I never figured out how to make them to the level of quality we strive for, and for the price we thought they could sell at. The idea was for the bookends to be playable toys, outfitted with simple dowel people (much like the little peg people you see everywhere).
Perhaps we need to go back a little further.
Before Happy Bungalow was Happy Bungalow it was Kiddie Kottages. When Liz and I were first dreaming up this business we were going to create playhouses for children (spurred on by the encouragement of friends, see the playhouse here). We made notes and sketches. We created 3D models of the playhouses. We thought up just the right business name and registered domains (until recently kiddiekottages.com and kiddiecottages.com redirected to happybungalow.com).
And then we thought up some little products to accompany the playhouses. The idea was that we’d make the playhouses and everything you needed to put in them. So the original Happy Bungalow product line started out as accessories to Kiddie Kottages’ big playhouses. But starting a new business and creating these multi-thousand dollar playhouses was too much, so we focused on the smaller pieces at first with the goal to move on to playhouses later.
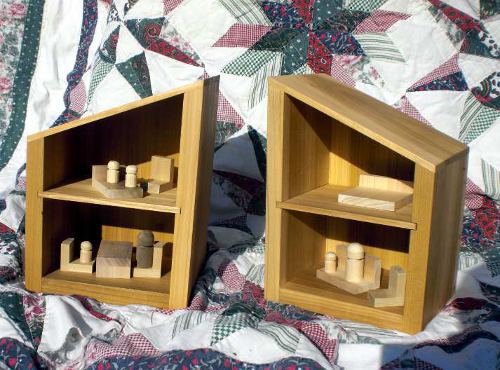
We’ve pretty much given up on the playhouses for the immediate future, but some of those original products still hang on (our wooden animal toys being the most notable). Much like the never realized castle bookends, the dollhouse bookends below went through extensive prototyping (and before that digital models you can read about here), but end the end it was hard to find a workable price-point for them. It was also difficult to generate the level of quality (again at workable price point). Though the shop has expanded its tooling, we might take another attempt at it.
The simple little furniture did prompt a friend to ask if I could make some furniture for her daughter’s inherited dollhouse. Well, that is a product line that has done quite well (read more dollhouse furniture posts here).
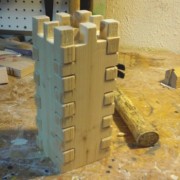
So in the end the castle bookends never made it into production. The corner joints (box joints) were the problem. I was attempting to create a faux quoining (fancy architecture word for those stones that stick out on the corner of buildings). Perhaps one of these days . . .
We have loads of toys here at the Bungalow. After all, we make wooden toys for a living. The Kids here have plenty of the same toys we sell, loads of toy prototypes, and scattered one-offs & specials too impractical to produce for sale.
And we have mass-produced, mass-marketed toys as well. We love and adore and appreciate the support of small boutique shops. They’re wonderful, sell awesome stuff that’s just about impossible to find anywhere else. And the people working the shop are terrific passionate people. But . . .
But they don’t sell Barbies. Or Strawberry Shortcake. Or Lights and Sirens On! Firetrucks. And Legos. We have loads of fun with Legos around here. Sure, the wooden toy maker’s kids have plastic toys. Sure, we’ve heard the arguments against these sort of toys. Overseas labor, bad for the environment, durability, etc. And while there are valid points to be made, the world is a complicated and cruel place. We haven’t seen the absolute rule that serves the best interests of the global community.
Mass-produced doesn’t have to mean cheap, and if you take care of the toys, they can hang around for a good while (of course we’re the biggest fans of quality handmade wooden toys – it’s just hard to hand carve a wooden doll that looks just like the ones on the television).
We are firm in having no pretend dangerous toys. We have no toys guns, knives, or swords (as if kids didn’t pretend every stick was a gun or sword anyway). And we certainly don’t endorse toy tools! Last year a gift toy chainsaw spent all of two minutes in the house. Our woodshop is in our basement, and while it’s safely behind a locked door we educate our kids on the dangers of these tools. It’s a hard and fast rule that tools are not toys. There are three saws in our shop that will cut off a hand just as easily as they cut wood. So we want none of our children in the habit of regarding any saw as a toy.
We’re comfortable with some mass-produced toys, but too many are groan inducing.
Like the countless primary-colored, battery-required, insanity-generating models. Especially tiresome are the “educational toys”. I’m pretty sure we’ve never bought one, but they show up here none-the-less (sort of like the dolls and trucks I swear are self-replicating). But you know those “learning toys” that “teach” shapes and colors. And the A, B, and C. Because all you really need in life are three letters.
I suppose one or two of these fellas wouldn’t be so bad, but after a few dozen of the battery hungry monsters accumulate . . .
The packages tout their benefits. Letter recognition. Color recognition. Hand/eye coordination. They’ll improve thinking skills and boost creativity. A greater understanding of math and geometry. Perhaps they’ll increase your child’s IQ. Good grief! Read enough of it and you’d think that singing light-up helicopter will have your kid solving algebra problems in kindergarten.
Even the non-battery operated toys tout their giftedness. We have a fun little block set that promotes color recognition and hand/eye coordination. Doesn’t picking wildflowers do the same thing?
You want a child to learn something? Teach them. Read to them. Once they learn to read on their own, buy them books. And paper. Pencils. Crayons and markers. Get em a cheap camera. Let em loose in the backyard, in the park, go explore your local urban environ. They’ll learn a ton, and I bet they’ll have fun doing it.
You want a child to have fun? Give them a toy. Make a toy with them. Play with them. Before long little worlds will be born and flourish. Great tales will be written by you and your child. You’ll both have a ton of fun, and I bet you’ll learn something while doing it.
We’ve been making a lot of stars lately. Hundreds and hundreds of stars; which is awesome because someone is paying us to make stuff! How much cooler of a job can you have? But, as we’re making hundreds at a time, it’s best to be efficient at it.
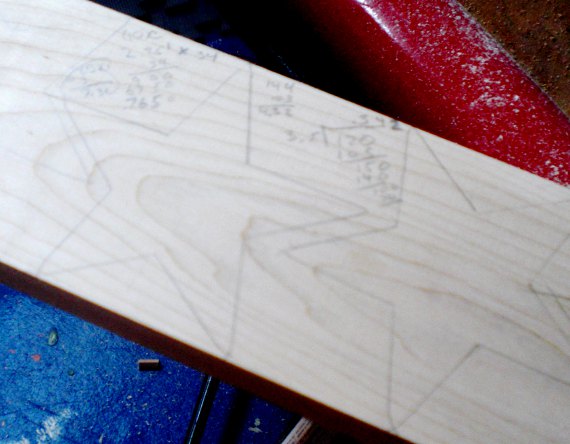 So the stars are laid out on the wood before cutting (no, even though I’ve cut more than a thousand stars, I can’t cut them from memory). So I laid out a few stars and then measured to see how many stars would fit onto so many feet of board. It’s something like a word problem:
Don has to make 100 stars. If 7 stars fit onto 1.8 feet of maple board, how many feet of board will he need to make 100 stars? (assuming no knots or other defects in the wood that would have to be cut out)
Except there’s no calculator in the shop – only old fashioned long-hand math.
I also figured up how many square inches of wood each star used – this told me my raw materiel cost for each piece.
So yes, math is important. I don’t use calculus in the shop very often, but geometry and algebra are very important. Kids! Pay attention in math class! Don’t end up being the person that needs a calculator to double check his 7 + 7 math.
As a side-diversion:
Before I made toys, I was an architect (technically I still am, I just haven’t done any for-hire work in a while now). The number one response when telling a stranger I’m architect: “You must be good at math.”
Well, I am good at math, I think it’s fun – like solving a puzzle – but surprisingly to most people great math skills aren’t essential to architecture. Basic geometry and a little algebra is all you really need to be competent. A high-schooler would be able to handle most of the math work.
So what’s the number one skill essential to being an architect? Working an unspeakable number of thankless (and unpaid) hours.
As a toy-maker at Happy Bungalow I work more hours, but they are the opposite of thankless. I have fun every day, almost without pause. I mean come on! We’re making toys here. My job is to make toys!
Stop into our online toy shop to take home some of our work.
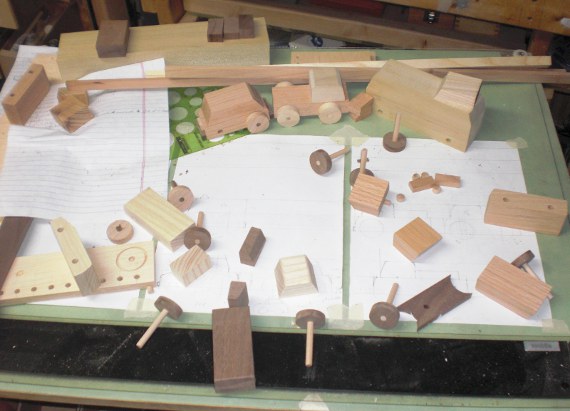
 New wood cars are being designed and constructed here at the Bungalow. These prototypes are taped together, unfinished, and in need of sanding – but this hasn’t dulled a certain household member’s excitement. Finally we have made a fire truck! Fire truck! Fire truck! Along with a semi-truck, taxi, dragster, fuel truck, mini-car, and bus we’ve amassed enough vehicles to put together a Car of the Month Club.
We’re envisioning this Car of the Month Club to be something like a jelly of the month club, except much lower in sugar and much higher in fiber*. As rated by the Kids, the favorite new vehicle is (hands down) the fire truck. The semi-truck is a close second though. We’ll be working on a few interchangeable trailers soon.
While these trucks aren’t yet available for purchase we have some other great wooden cars in our shop.
* Our toys are not really edible
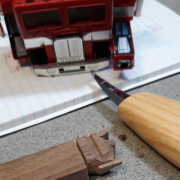
Well, I don’t know just how many steps there are, but I bet I’m close. We make our toy cars and trucks like any other toy we make: Quizzing The Kids about what they’d like to see in a new toy. Then come some sketches which they usually don’t understand, but are enthusiastic to support. Next comes some hand-drafted drawings (see picture below) and the first round of prototypes which The Kids understand well.
( You can see the first prototypes in the picture below in the center towards the top of the drafting board. )
So the Kids play with the prototype cars for a while and then we hold a panel review session. It goes something like this:
Me: “What would you say you like most about this product?”
The Kids: “They’re great! Too cool!”
Me: “What would you say you like least about this product?”
The Kids: “They’re great! Too cool!”
This feedback really helps to inflate my ego and solidify my position as Most Awesome Dad.
I play with The Kids, see what other toys are invited to play with the new group, and keep an eye out for rough play that might reveal weaknesses. Then I take the toys back to the shop for simulated play and abusive testing. Weaknesses are corrected and the design/look of the toy is usually tweaked.
Then it’s on to figuring out how I’m going to build these things. It’s one thing to build a one off toy for the fun of it, it’s another thing to make quality toys for a price people are willing to pay. It’s a long process and quickly drifts into the weeds of specifics . . .
 . . . so we’ll shorten it up a bit . . . a stack of wood is planed, cut, sawn, cut, sawn, and cut again. And here at the Bungalow we use hardwoods – not a 2×4 (aka pine, spruce, or fir). These cars are made from red oak, ash, walnut, and hickory. Tough enough to be played with by three year old boys and strong enough to survive a random gnawing by a little brother.
Once all the piece are cut, they’re neatly stacked (see above). All the cars have a base and a top, are the same width, mostly the same length, and are all cut with complementary angles. Every car gets two holes drilled for axles (see below) and one small hole on the bottom where the tow truck can hook onto. I use a custom-made adjustable jig for all the drilling.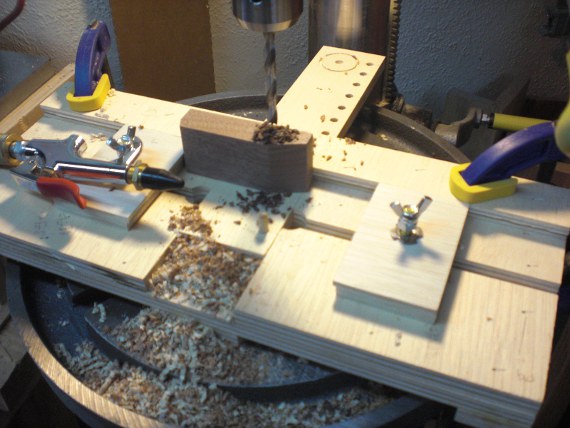 This operations piles up the saw dust – I depend on my compressed air hose to keep the work-surface clear. I drill and drill and drill and drill. You might think drilling holes for an hour or more is boring – but you’re wrong. I get to sit on a stool while I do it. It’s hard to be bored in the shop when you’re feet are happy.
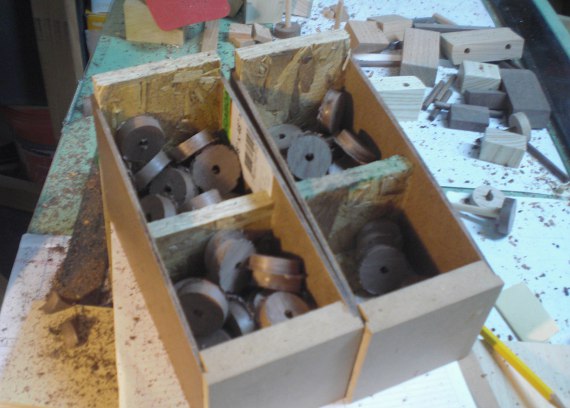
All Happy Bungalow cars are equipped with Strong Ox tires, mfg. Cincinnati, Ohio. They’re cut with a special hole saw. The wheels are made from walnut, unlike most wood toy cars you see which are made from a lighter toned wood (maple or beech) and look suspiciously similar. Our axles are cut from walnut dowels.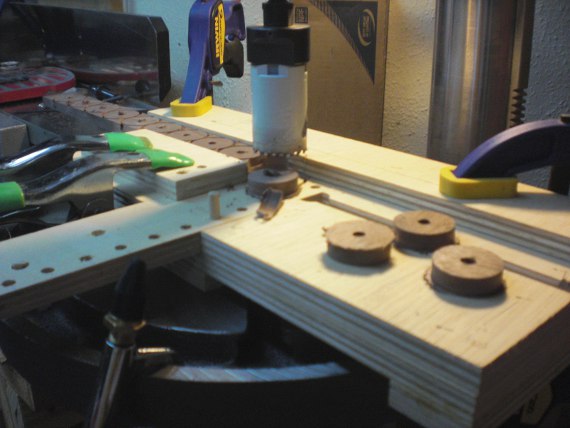 By now there’s a stack of car parts that need gluing, sanding, gluing, sanding, sanding, a smidge more sanding, and finally some natural wax finishing. I use power sanders, but a lot of the sanding work is done by hand. All corners are smoothed over – no sharp edges are left to pester little hands. I cringe to say this, because it sounds like some lame marketing line, but I do pride myself on craftsmanship. Well made, well detailed, and finely finished.
 See the end results here. And take home your own car from our shop here.
I’ve embraced the idea of being a toy-maker. Initially I was hesitant for a two reasons.
One: I thought I was excluding too much potential customers. Ha! It turns out there’s loads of adults out there who still want to have fun. Also, developing a new product line is time consuming; perfecting the craft even more so. It’s better to focus on what I know best and build upon it.
Two: I wasn’t comfortable with being labeled a toy-maker, but I’m cool with it now. It makes people happy. What I do makes other people happy! And I make a few bucks doing it. It’s hard to beat that. Though I still make business card holders, the occasional clock, and the coolest cabinet hardware you’ve seen. And that gray area of toys: miniature furniture.
So I’ve been growing the toy lines. Adding more robots, many more animals, and unicorns. I’ve also added completely new lines of cars/trucks, pirates/sea life, and aliens/monsters. There’s plans on the horizon to create a line of boats and airplanes. Just about something for everyone, and all within the toy umbrella.
So with all this new stuff I’ve been tweaking the show setup lately. It’s no longer a matter of filling space, but trying to keep the space organized so people can find everything.

This is my setup from the past week. I’ve added another shelf to hold animals and I could use more space with all the animal requests coming in (just when I thought I had them all). A revamped circus is back on display along with the play trees. Gone is the very tall tree stand, though I’d love to get it back into the mix somehow, perhaps on a back table.
The robots, cars, and monsters are getting along well with each other. I have a magnetic board that’s super-handy for switching around displays. I’m planning on adding another shelf there for the old railroad town buildings and expanded dollhouse furniture display.
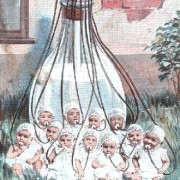
Beyond product I also want to add more fun to the booth. For the website, I’m working on a story that links all the different toy worlds together that I want to bring to the physical. You can see a piece of it in the air. To the left of the sign post is a kids floating away holding onto a bunch of balloons. He couldn’t afford a hot-air balloon ride at the circus, but he could buy helium balloons on the cheap (in the story this sends him to fairy land). So I’ll be working with the Kids to build more props. Stay tuned everyone.