Wood Toy Cars – How They’re Made


How To Make a Wood Toy Car

In 38 Not So Easy Steps

(w/ Illustrations)


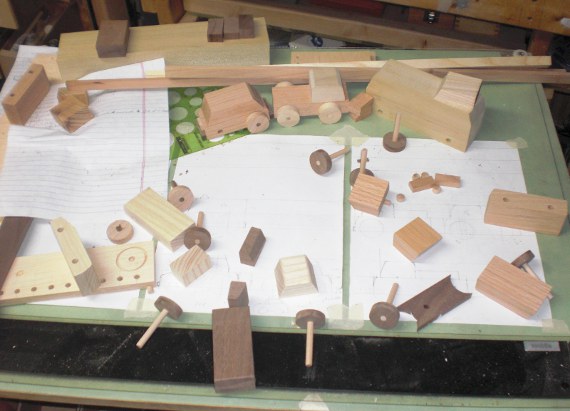
Well, I don’t know just how many steps there are, but I bet I’m close.  We make our toy cars and trucks like any other toy we make: Quizzing The Kids about what they’d like to see in a new toy. Then come some sketches which they usually don’t understand, but are enthusiastic to support. Next comes some hand-drafted drawings (see picture below) and the first round of prototypes which The Kids understand well.

( You can see the first prototypes in the picture below in the center towards the top of the drafting board. )

Wood Cars on the Drawing Board.

So the Kids play with the prototype cars for a while and then we hold a panel review session.  It goes something like this:

Me:  “What would you say you like most about this product?”

The Kids:  “They’re great!  Too cool!”

Me:  “What would you say you like least about this product?”

The Kids:  “They’re great!  Too cool!”

This feedback really helps to inflate my ego and solidify my position as Most Awesome Dad.

I play with The Kids, see what other toys are invited to play with the new group, and keep an eye out for rough play that might reveal weaknesses.  Then I take the toys back to the shop for simulated play and abusive testing.  Weaknesses are corrected and the design/look of the toy is usually tweaked.

Then it’s on to figuring out how I’m going to build these things.  It’s one thing to build a one off toy for the fun of it, it’s another thing to make  quality toys for a price people are willing to pay.  It’s a long process and quickly drifts into the weeds of specifics . . .

Pieces for Toy Cars cut and ready for drilling.
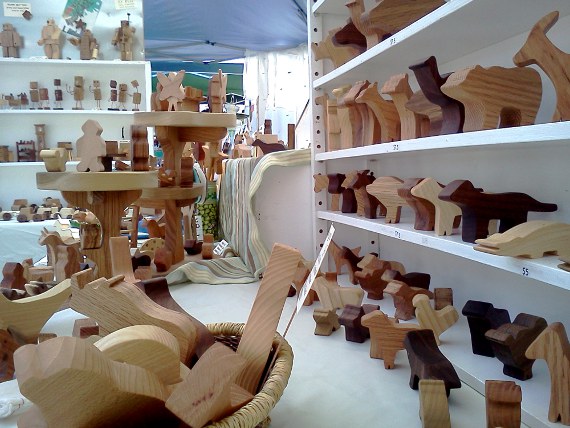
. . .  so we’ll shorten it up a bit . . . a stack of wood is planed, cut, sawn, cut, sawn, and cut again.  And here at the Bungalow we use hardwoods – not a 2×4 (aka pine, spruce, or fir).  These cars are made from red oak, ash, walnut, and hickory.  Tough enough to be played with by three year old boys and strong enough to survive a random gnawing by a little brother.

Once all the piece are cut, they’re neatly stacked (see above).  All the cars have a base and a top, are the same width, mostly the same length, and are all cut with complementary angles.  Every car gets two holes drilled for axles (see below) and one small hole on the bottom where the tow truck can hook onto.  I use a custom-made adjustable jig for all the drilling.Wood Toy Car on drill press.
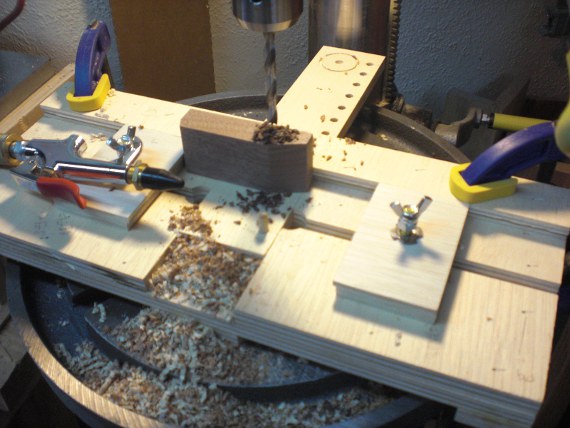
This operations piles up the saw dust – I depend on my compressed air hose to keep the work-surface clear.  I drill and drill and drill and drill.  You might think drilling holes for an hour or more is boring – but you’re wrong.  I get to sit on a stool while I do it.  It’s hard to be bored in the shop when you’re feet are happy.

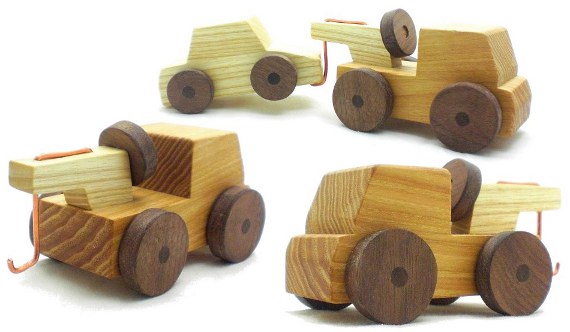
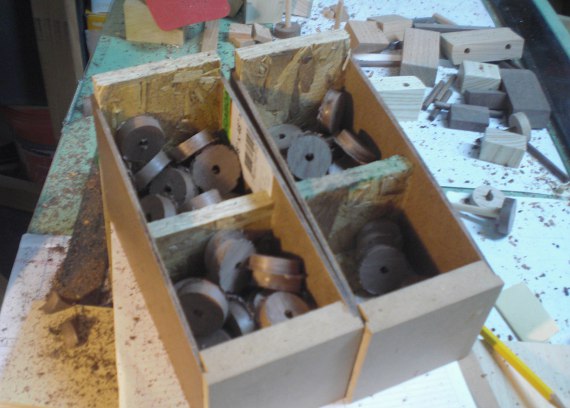
All Happy Bungalow cars are equipped with Strong Ox tires, mfg. Cincinnati, Ohio.  They’re cut with a special hole saw.  The wheels are made from walnut, unlike most wood toy cars you see which are made from a lighter toned wood (maple or beech) and look suspiciously similar.  Our axles are cut from walnut dowels.Strong Ox Tires production, mfg. Cincinnati Ohio
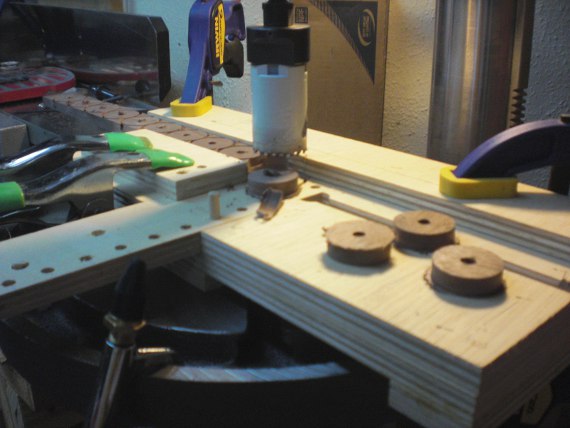
By now there’s a stack of car parts that need gluing, sanding, gluing, sanding, sanding, a smidge more sanding, and finally some natural wax finishing.  I use power sanders, but a lot of the sanding work is done by hand.  All corners are smoothed over – no sharp edges are left to pester little hands.  I cringe to say this, because it sounds like some lame marketing line, but I do pride myself on craftsmanship.  Well made, well detailed, and finely finished.

Wood Tires waiting sanding.See the end results hereAnd take home your own car from our shop here.

Snowman Cake (recipe)

Happy-Bungalow-snowman-cakeRecently the Kids demanded the creation of a Snowman Cake. “Snowman cake!”

“OK,” the parents of the house said.  “What’s a snowman cake?”

There followed a good five minutes determining, debating, and settling upon just what a snowman cake is.  In the end we concluded that the Kids didn’t know what a snowman cake was, only that they wanted to make one.

What resulted was a young-person directed monument to overindulgence.  Here’s how it went:

My wife baked a 13×9 sheet cake.  Everyone helped spread on chocolate frosting.  Good so far.

And here’s where, if you’re making this at home, I highly recommend you STOP.  Slice the cake and serve with a glass of cold milk or a dish of ice cream.  You’ll thank me.

We did not stop there however.  Keeping with the ill-defined snowman theme the cake was assaulted with powdered sugar (don’t think dusted with; think dumped on).  Next came colored sugar and leftover cupcake decorations.  And why not pour on a quarter cup of sprinkles?  For good measure.

BUT WAIT!  THERE’S MORE!

We had some chocolate chips lying around.  On the cake they go!  “Somethings missing. . .”  The Kids muse.  Yes of course, we’re missing smiley faces of M&Ms.

And just in case any sweetness tried to escape (or a vegetable tried to nose its way in), the perimeter of the cake was ringed with a wall of marshmallows.

You might be thinking, “Why did you let your children put so much on top of the cake?”  Two reasons:  1. Dancing in my head was a vision of some Hallmark / Norman Rockwell family story that would be passed down for generations.  “Remember the time we made the 2,000 calorie a slice snowman cake?”  2. I do like deserts, and on paper this cake was adding up quite nicely.

But, as you’ve no-doubt sleuthed, the cake was terrible.  When we weren’t choking on powered sugar dust, the rest of the sweet lot was actively boring holes into our teeth.  And naturally none of the Kids ate a marshmallow.  Mostly they picked off the chocolate chips and M&Ms.

In the end I salvaged the day with a toy bulldozer – strip-mining the cake until the edible original layer of cake frosting was exposed.  Messy, but fun; and a respectable dessert.  [or desert – I get them confused – whichever one isn’t filled with sand and camels]

Well, I guess in the end we might have ended up with a cherished family story after all.

I’m off to the dentist now.

Buffalo – Fuzzy in Real Life, Fun as a Toy

Whatever you call it – buffalo or bison – this baby is A-dorable.  There’s a state park (Big Bone Lick) near the Bungalow that has, amongst other cool attractions, a herd of buffalo.  The Kids here love it.  In times past Big Bone Lick was a gathering spot for animals of all sizes.  Bison, mastodon, giant sloth, among them.  The area was mineral rich (like a natural salt lick – hence the lick).  Unfortunately for the larger creatures the ground was boggy and many of the animals sank into the ground and later died.  The bones of these large animals were later unearthed (hence Big Bone).

Happy-Bungalow-bison-buffalo-570We love the buffalo so much that we’ve rendered the bison in wood (walnut).  You can find them in our shop.


Happy-Bungalow-natural-wood-animal-child-safe-toy-beeswax-farm-wild-walnut-BISON-BUFFALO-alt001-570

Model 80 “Heavy Lifting Hal”

Happy-Bunglaow-wood-retro-robot-toy-MODEL-80-beech-alt008-570

The Model 80 was developed by QreXion Inc. Utilizing revolutionary actuator systems, staggered limb jointings, and slim-line power systems, the robot was able to lift and carry extreme loads over long distances.

Unfortunately QreXion was as deficient in accounting aptitude as it was rich in engineering skill and the company fell into financial troubles before it could turn the Model 80 into a production robot.

QreXion was later acquired by Stobor robotS. Stobor retained the prototype Model 80 name (the quirky company preferred robots with whimsical names). Nicknamed “Heavy Lifting Hal”, the robot was sold to the industrial facilities around the globe. Firmware upgrades later made the robot autonomous, eliminating the need for human supervisors.

Fun Fact: A tremendous success, “Hal” is credited with the obsolescence of the forklift.

Pick up Hal today in the Bungalow’s shop

Vroom Vroom!

We have a boy here at the Bungalow in love with all things wheeled.  He rates our new line of cars and trucks AWESOME.  Unlike most wood cars, our wheels are made by us.  Made from walnut, with matching walnut axles, they look like real car tires.  Everything is hand sanded smooth and finished with a beeswax polish we make ourselves.  Take home yours today in our store.Happy-Bungalow-wood-car-toy-boy-gift-TOW-TRUCK-alt006-570

Happy-Bungalow-wood-car-toy-boy-gift-VAN-hickory-altt006-570

Happy-Bungalow-wood-car-toy-boy-gift-SPORTS-CAR-ash-altt006-570

Happy-Bungalow-wood-car-toy-boy-gift-TRUCK-ash-red-oak-alt006-570

Craft Show Post Show

Happy-Bungalow-art-craft-show-setup-2013-09-08-alt002-570

I’ve embraced the idea of being a toy-maker.  Initially I was hesitant for a two reasons.

One:  I thought I was excluding too much potential customers.  Ha!  It turns out there’s loads of adults out there who still want to have fun.  Also, developing a new product line is time consuming; perfecting the craft even more so.  It’s better to focus on what I know best and build upon it.

Two:  I wasn’t comfortable with being labeled a toy-maker, but I’m cool with it now.  It makes people happy.  What I do makes other people happy!  And I make a few bucks doing it.  It’s hard to beat that.  Though I still make business card holders, the occasional clock, and the coolest cabinet hardware you’ve seen.  And that gray area of toys:  miniature furniture.

So I’ve been growing the toy lines.  Adding more robots, many more animals, and unicorns.  I’ve also added completely new lines of cars/trucks, pirates/sea life, and aliens/monsters.  There’s plans on the horizon to create a line of boats and airplanes.  Just about something for everyone, and all within the toy umbrella.

So with all this new stuff I’ve been tweaking the show setup lately.  It’s no longer a matter of filling space, but trying to keep the space organized so people can find everything.

Happy-Bungalow-art-craft-show-setup-2013-09-08-alt001-570

This is my setup from the past week.  I’ve added another shelf to hold animals and I could use more space with all the animal requests coming in (just when I thought I had them all).  A revamped circus is back on display along with the play trees.  Gone is the very tall tree stand, though I’d love to get it back into the mix somehow, perhaps on a back table.

The robots, cars, and monsters are getting along well with each other.  I have a magnetic board that’s super-handy for switching around displays.  I’m planning on adding another shelf there for the old railroad town buildings and expanded dollhouse furniture display.

Beyond product I also want to add more fun to the booth. For the website, I’m working on a story that links all the different toy worlds together that I want to bring to the physical. You can see a piece of it in the air. To the left of the sign post is a kids floating away holding onto a bunch of balloons.  He couldn’t afford a hot-air balloon ride at the circus, but he could buy helium balloons on the cheap (in the story this sends him to fairy land).  So I’ll be working with the Kids to build more props.  Stay tuned everyone.

Tot’s First Bot

The robot toy is made up of only two pieces: the body and feet. Grooves cut into the wood set off the arms, waist, and neck.  The wood, ash, is tough (think baseball bat swinging for the seats) and will stand up well to loads of play. And everything is finished with a beeswax polish we make ourselves.

Happy-Bungalow-wood-robot-kids-toy-ash-TOTS-FIRST-BOT-alt003-570

Perfect Wood Robot Toy for Little Kids

Fresh out of the shop:  Guard Bot “200”.  The latest robot in Happy Bungalow’s line is little kid friendly.  These bots are glued together (no magnets like other Bungalow bots), but the arms and head still spin.  Made of red oak and finished with a beeswax polish we make ourselves.Happy-Bungalow-toy-robot-kids-toy-wood-red-oak-GUARD-BOT-alt006-570

Cicadas

The family was playing in the front yard the other day and while we turn up our share of cicada shells, never have we found a live cicada emerging from it’s old shell.  It was our lucky day.  While playing, we watched this little guy for more than an hour.

Happy-Bungalow-cicada-alt001-570 Happy-Bungalow-cicada-alt002-570 Happy-Bungalow-cicada-alt003-570 Happy-Bungalow-cicada-alt004-570 Happy-Bungalow-cicada-alt005-570 Happy-Bungalow-cicada-alt006-570

We also put together a little stick house; for bugs, fairies, or whatnot.

Happy-Bungalow-stick-house-outdoor-craft-alt001-570 Happy-Bungalow-stick-house-outdoor-craft-alt002-570

Miniature Kitchen Cabinets

Miniature furniture is perfect for my small shop.  Transitioning from woodworking as a hobby into a business the new tools, more wood, and project storage space has severely cut into the shop free space.  So full size furniture building is a trickier proposition.Happy-Bungalow-miniature-furniture-custom-cabinetry-kitchen-alt002-570

This is a kitchen I modeled on my own full size kitchen.  Except in real life I don’t have room for an island.  And I don’t have the nice walnut furniture piece you see on the left (though I do have an herb garden in a window box – not a bad trade).

Happy-Bungalow-miniature-furniture-custom-cabinetry-kitchen-alt002a-570

The little brass knobs I bought, but the dark walnut knobs I made.  Tiny little suckers.  A bit more than 1/16th inch square.  I don’t have any dedicated miniature tools, but I’ve learned to cut accurate scale lumber on full size saws.Happy-Bungalow-miniature-furniture-custom-cabinetry-kitchen-alt001a-570

It was a real chore to come up with the counter-tops and have them look something like stone.  Real stone doesn’t come in 1/8 sheets (too brittle I suppose) and laminate isn’t at the right scale.  In ended up painting thin pieces of oak in multiple layers while the paint was still wet.  It has sort of a marbled look – I’ll keep working.

Happy-Bungalow-miniature-furniture-custom-cabinetry-kitchen-alt003-570