Wood Clocks Process #2

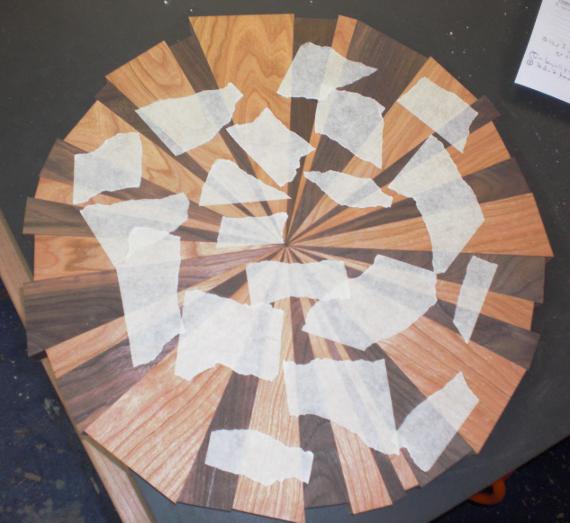
In  part one of the wood clocks process series (read here) I talked about cutting a number of angled pieces of wood.  A box-full of wood pieces, in fact.  I lay all the pieces out on a table and go to work creating a pleasing composition.  With some fussing, this process goes easy until the clock circle is about seven-eigths full.  Then it’s time to trade out triangles here and there to make a 360 degree circle.  To make certain of this, I tape the pieces securely together.  Once I have a working circle I move some of the triangles around to fuss with the layout.

Happy Bungalow Wood Clock Process 06 Walnut Cherry Dryfit Layout

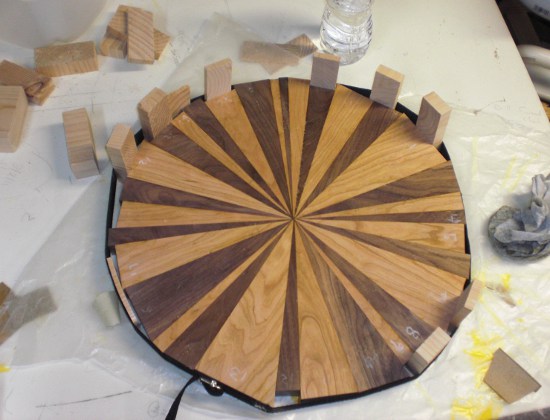
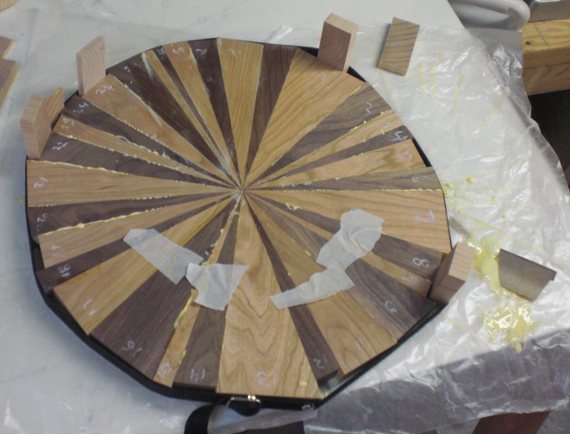
Next comes the glue.  I lay down some wax paper on the table to keep the clock from gluing itself to the table.  There’s between 25-35 pieces in each clock and each side needs glue applied evenly.  I have to move quickly so the glue doesn’t set before I’m finished.  You can see the glue squeezing out in the picture below – this is a good thing as it means the joints are filled.

Once all the glue is on and the pieces are in place I put a strap around everything – that’s the black band in the picture.  I cinch the strap then insert blocks of wood around the perimeter.  The blocks help to make up for the different lengths of wood and give added clamping pressure.  Then I wipe all the excess glue away with a damp cloth.

Happy Bungalow Wood Clock Process 06a Walnut Cherry Wet Glue

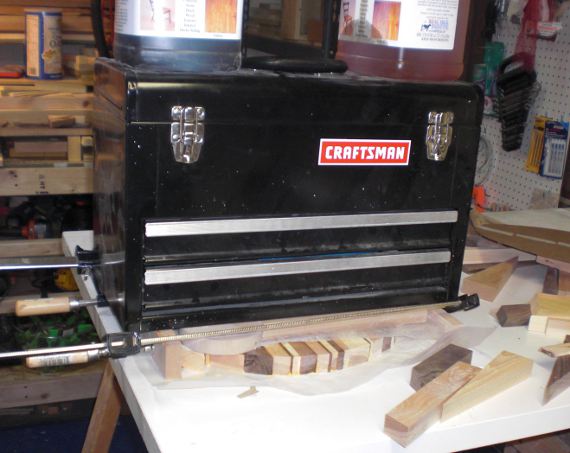
Next comes another sheet of wax paper and some MDF spacers to clear the wood blocks on the perimeter.  I pile on my heaviest tool box and anything else that’s heavy and handy.  This weight keeps the pieces flush.  You can see some glue squeezing out on the sides – but this isn’t a problem as the clock will be trimmed later.

The picture shows a wood-strip clock being glued up – more on that below.

The clock dries for a while before the weight is removed.  You can see a little glue that leaked through, but it’s nothing a little sanding won’t clear up.

Happy Bungalow Wood Clock Process 07 Walnut Cherry Glueup

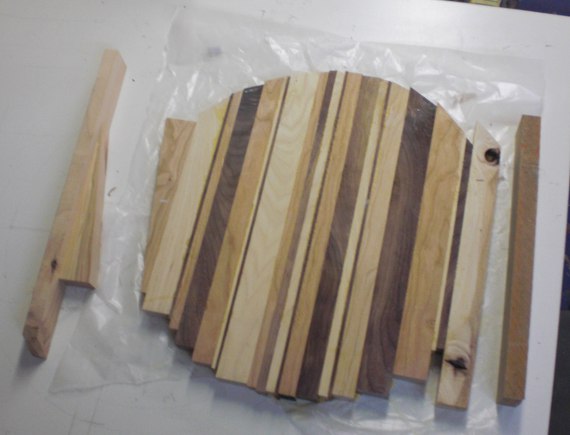
The picture below is one of the wood-strip clocks.  It’s like the other clocks except it only has one angle, so there’s much less math involved.  I lay out the strips, then cut each strip roughly to length so I don’t loose any more wood than necessary.  On the left you can see a rejected angle piece and a buddy angle that I used to clamp everything together.

The strip clocks don’t need the belt clamp – just a pair of bar clamps (and the heavy weight on top).  More on trimming, sanding, and finishing in the next post.

Happy-Bungalow-Wood-Clock-Process-09-Strip-Clock-Post-Glueup

Read the next post in the series here
Wood Clocks Process #1

Hardwood Clocks are in the works here at the Bungalow and I’m here to give you a behind the scenes tour of their construction.

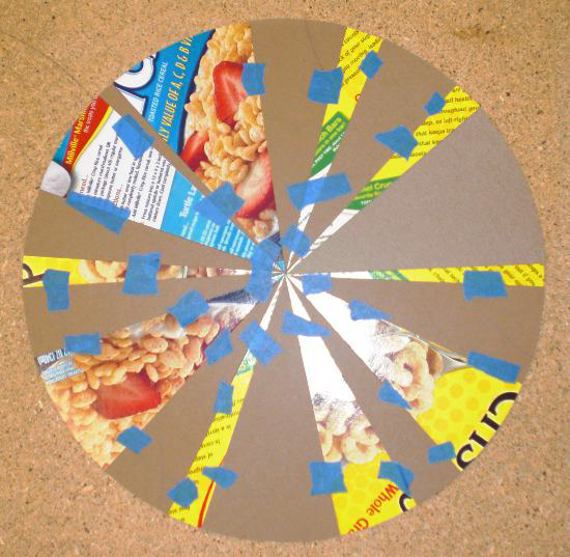
At first I made templates for the clocks out of cereal boxes.  I figured I could mix and match angles, colors, and the like to make pleasing compositions.  I took out my compass (hand drafting isn’t dead yet) and cut out 40 or so different angle templates.  Then I mixed and matched until the angles added up to 360 degrees (see below).

Happy Bungalow Wood Clock Process 01 Cereal Box Template Layout

Now I could be assured my cut pieces of wood would form a perfect 360 circle.  All I had to do was transfer the exact angles to select pieces of wood and cut those angles exactly with no margin for error.

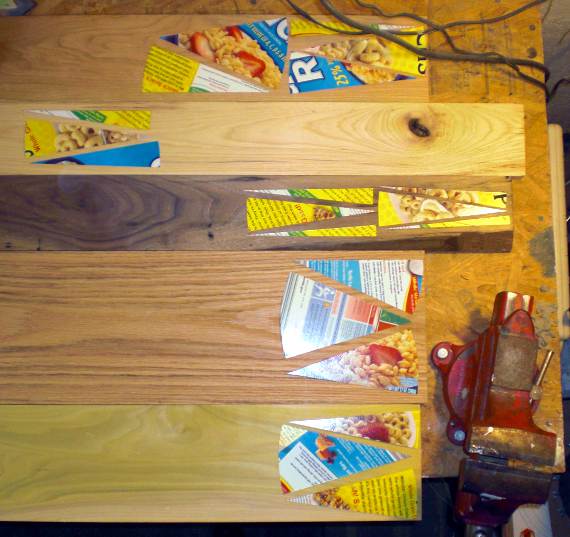
Laying out the templates on the wood went well, after that things sort of fell apart.  I selected five different woods for the first clock (from top to bottom in the picture) – cherry, hickory, walnut, red oak, and poplar.

Happy Bungalow Wood Clock Process 02 Template Layout On Wood

I transferred the angles to the wood with a pencil, cut the pieces to length on the miter saw then turned to the tablesaw.  Here is where my grand plan began to unravel.  Just how do I cut those angles with no margin for error?  I looked around for a laser wielding robot, but I don’t have any in the shop.  The best I could come up with was to fall back on high school geometry.

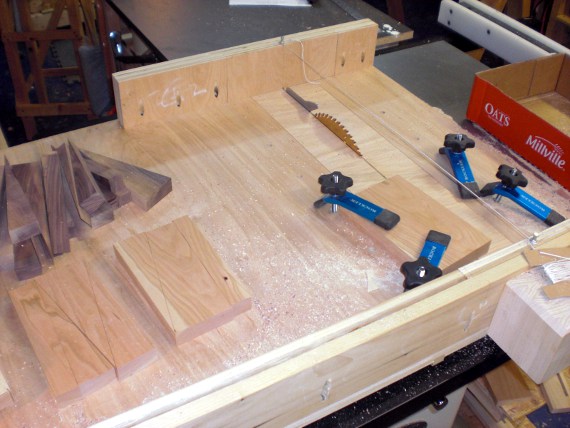
I cut small pieces on the tablesaw with a sled that slides on the top (and keeps my fingers far away from the blade) – see below.

Happy Bungalow Wood Clock Process 03 Cutting On Tablesaw

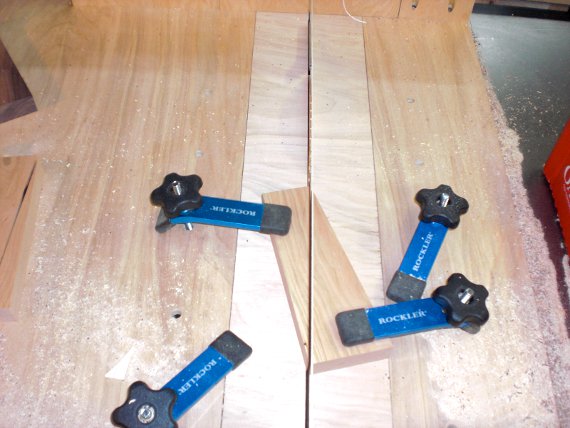
The sawblade leaves a cut line the exact width of the blade (handy) – this forms one side of a plane.  Directly above this line I attached a string that I could site the angle of the cut – forming the second side of a plane.   Line up the sawblade, the pencil mark on the wood, and the string – and the wood will be cut exactly.  Assuming the pencil line intersects the blade/string plane exactly.  You can see this in the picture better.

Happy Bungalow Wood Clock Process 04 Cutting Segments On Tablesaw

Of course no matter how “well” I eyeballed it, the angles couldn’t be cut exactly so I ditched that plan and just cut a load of different angles, figuring if I had enough angles I could put together a circle later.  You can see the blue clamps in the picture above – super handy for holding the wood in place securely and keeping me as safe as possible.

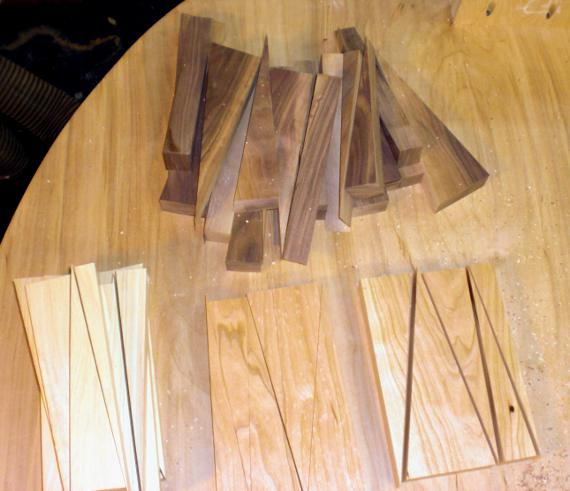
Below you can see stacks of the cut wood.  On the top are pieces of walnut.  The lower left is hickory and the lower right is cherry.  With the cherry you can see how I make the cuts – rotating the wood to keep the grain in as radiating a pattern as possible.  In the next post I’ll talk about layout and glue-up of the clocks.

Happy Bungalow Wood Clock Process 05 Wood Segments Laid Out Post Cutting

Read the next post in the series here
New Blog

I’ve been working for a few weeks (eek, has it been THAT long?) on a new WordPress blog for happybungalow.com.  WordPress will give me more flexibility and capabilities than my previous blog software.  BUT – I had to learn some new web programming and remember some other programming I had forgotten.

Now you can comment on the posts you see here.  Go ahead, comment away.

I’ll have some new pictures and blogs up shortly.  Some exciting stuff is in the pipeline.

See all of our completed products for sale at our etsy shop

New Stuff in the Works

This week is new product week (and next week and probably the next). On the drawing board: chessboard, serving trays, nifty clocks, plywood graphic paintings, jewelry boxes, and whatever else shows itself. I’m putting together a mockup for a wood starburst clock (see picture below) – trying to figure out how to build the thing. There’s 30+ pieces that need to fit exactly, and while I could draw it to exact dimensions and angles, I don’t think those angles would translate to the finished piece. So I figure I’ll trial and error the operation until I figure out the best method.

Anyway – I liked the mockup – thinking it would look good on a wall by itself. So I’m going to take all the little pieces and transfer the angles to pieces of cherry and glue up with the walnut strips. Now I have to figure out how to glue all the little pieces together just so.


Happy Bungalow Wall Art In Progress

Yesterday I was working on some plywood graphic paintings. I’ve done a few before and like the way they turn out – I figure some other people might too. It’s delicate work and as long as I don’t think about it my hand doesn’t shake – but then it does and I have a little oops. My instant reaction? I look up at the top of the painting for the UNDO button. It’s not the first real life mistake that I’ve looked for a digital correction for.

Happy Bungalow’s First Show

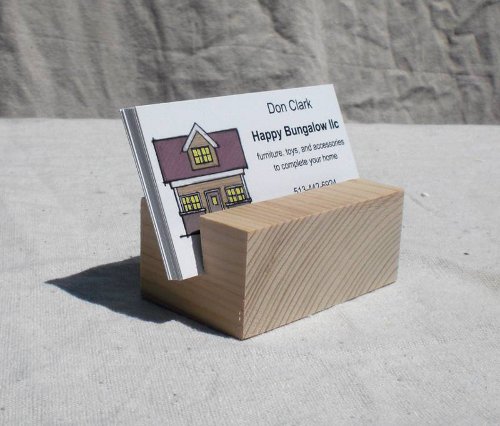
Happy Bungalow’s public debut will be on August 20th (click shows above to learn more). Besides making things to sell, I’ve been busy making everything else I’ll need: tables, a nifty sign, display stands, and business card holders. I had a few sketches for complex holders, but opted for something less fussy. The holder is planed smooth lumber with an angled dado.  [edit:  we now sell business card holders, find them in out online shop by clicking here]

wooden business card holder


The Playhouse that Started it All

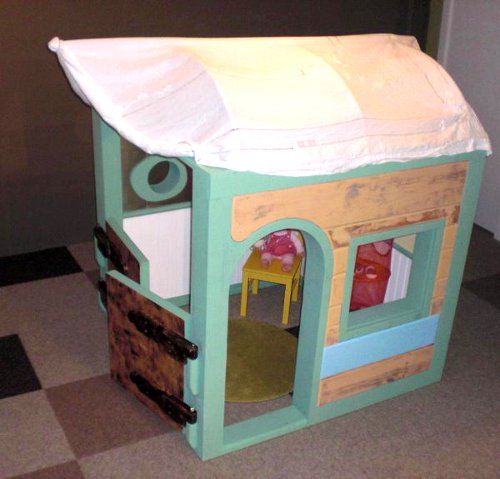
As I mentioned in my last post, here’s the indoor playhouse that I built for my daughter (before my son was born). The concept was a gypsy-wagon – the fabric roof and the swing out doors that make up the back wall (also handy for an adult entrance).
HappyBungalow-original_playhouse

The siding is recycled wood from a previous kitchen renovation project (wood that has been involved in three other projects). It turned out I had JUST enough wood to do the trick, though it took numerous layouts on the floor and swip-swapping of pieces to make it work. Sort of like a devious math puzzle.

wooden playhouse for kids

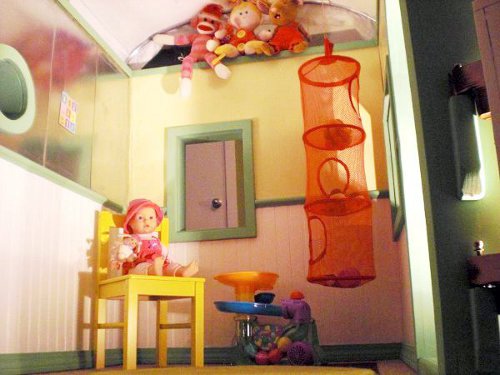
I made the hinges (except for old metal hinge pins) from wood and finished them with a torch – a technique I used for the knobs in my kitchen. Inside is a metal wall perfect for magnets. The roof is a cool old tablecloth.